Manage Organizations
Create New Organization
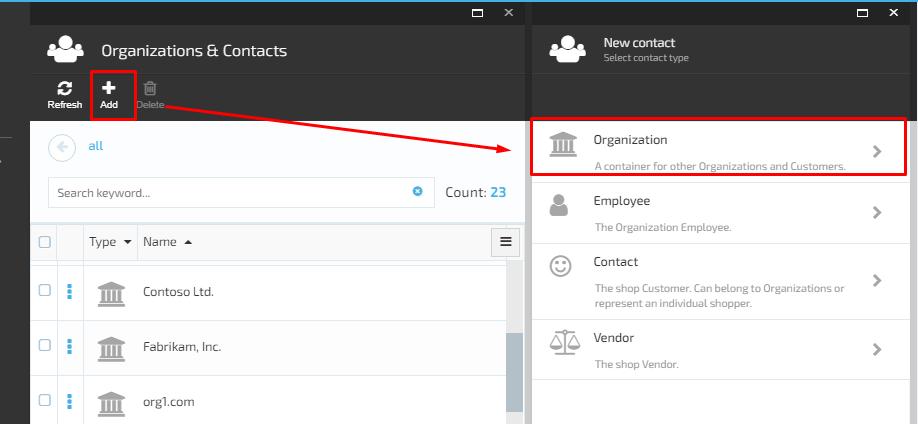
- The user browses the Contacts Module and clicks the ‘Add’ button;
- The system will display the ‘New contact’ screen and prompt the user to select the Contact type;
- The user selects ‘Organization’;
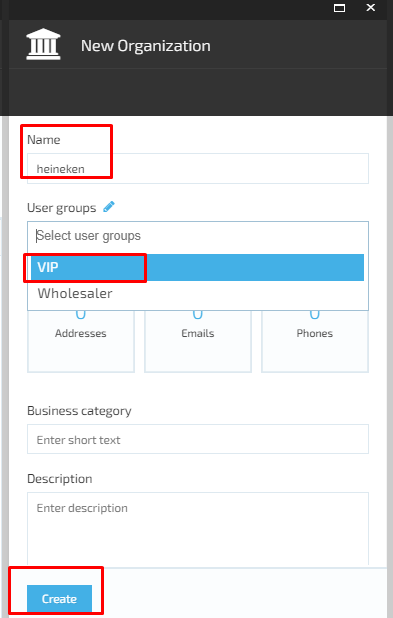
- The system will open the ‘New Organization’ screen:
- ‘Name’ field- required;
- ‘User group’ field with possibility to add a new group. Default values:
- VIP;
- Wholesaler;
- Widgets:
- Addresses;
- Emails;
- Phones.
- ‘Business category’ field;
- ‘Description’ text box;
- ‘Create’ button remains disabled until the required fields are filled out.
- The user fills out the fields and widgets displayed on the screen and clicks the ‘Create’ button;
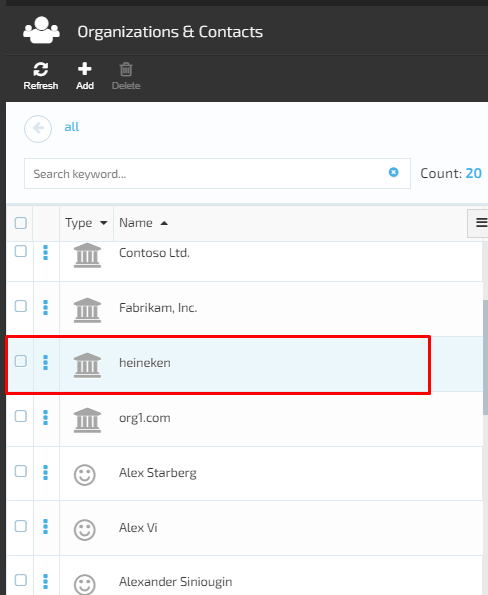
- The system will create the new Organization and display it in the list of contacts.
Edit Organization
Add User Group to the Organization
- The user clicks the ‘Edit’ icon for the ‘User Groups’;
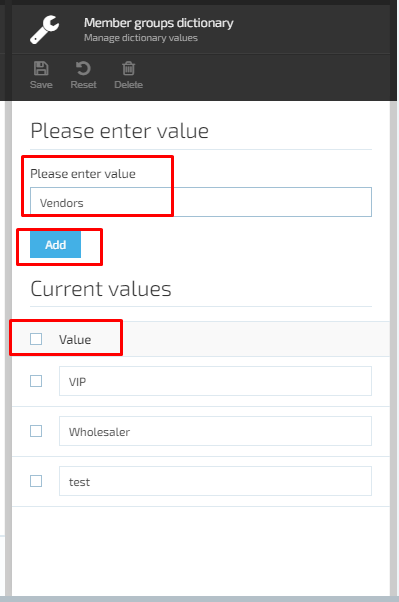
- The system will open the ‘Member groups dictionary’ screen (Manage dictionary values):
- ‘Please enter value’ field- required;
- ‘Add’ button disabled by default until the required filled is filled out.
- List of current values followed by check boxes and possibility to select a value;
- The user enters the name of the new value and clicks the ‘Add’ button;
- The new value will be added and displayed on the list;
- The user saves the changes and the new value will be displayed in the drop down list under ‘User groups’.
Add Address to the Organization
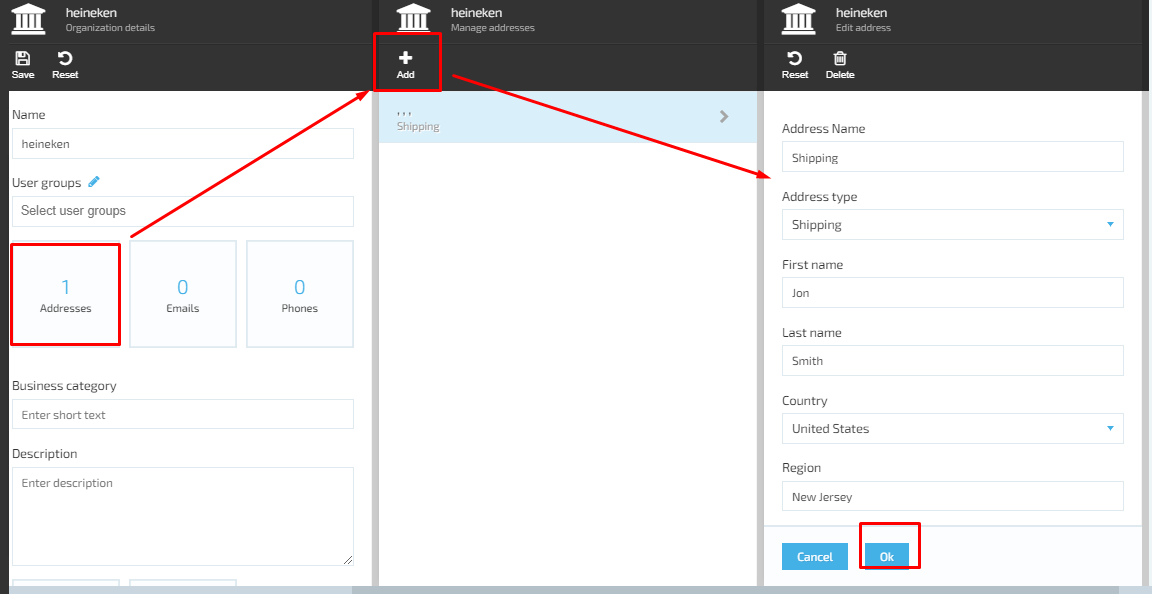
- The user selects the ‘Addresses’ widget on the ‘New Organization’ screen;
- The system will open the ‘Edit address’ screen:
- ‘Address name’ field;
- ‘Address type’ drop down;
- Billing;
- Shipping;
- Billing& Shipping;
- ‘First name’ field- required;
- ‘Last name’ field- required;
- ‘Country’ drop down- required;
- ‘Region’ field- required;
- ‘City’ field- required;
- ‘Address line 1’ field- required;
- ‘Address line 2’ field;
- ‘Zip code’ field – required;
- ‘Email’ field;
- ‘Phone’ field;
- ‘Cancel’/ ‘OK’ buttons.
- The user fills out the form and clicks the ‘OK’ button;
- The system will add the new address that will appear on the list of Organization addresses.
Add Email Address to the Organization
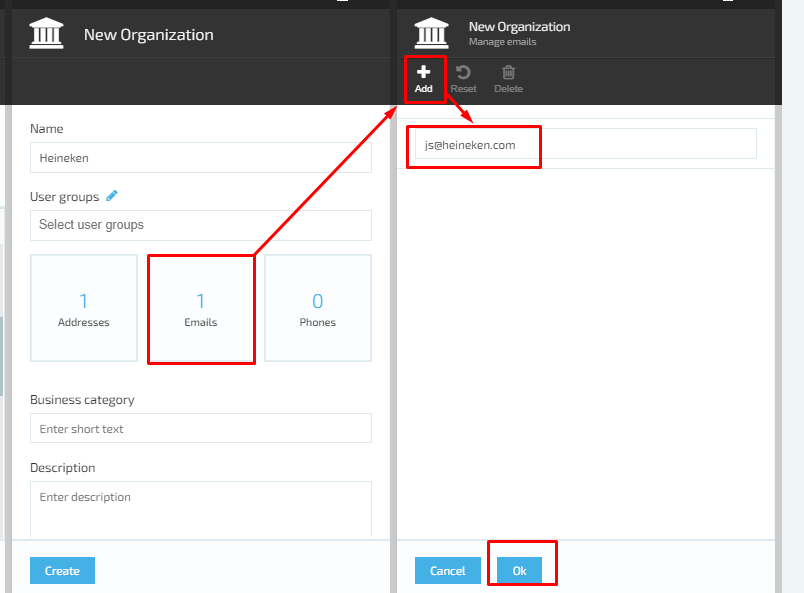
- The user selects the ‘Emails’ widget on ‘New Organization’ screen and clicks ‘Add’;
- The system will display the required email input text field;
- The user enters the email address and clicks ‘OK’;
- The system will add the entered email and display it on the ‘Manage emails’ screen.
Add Phone Number to the Organization
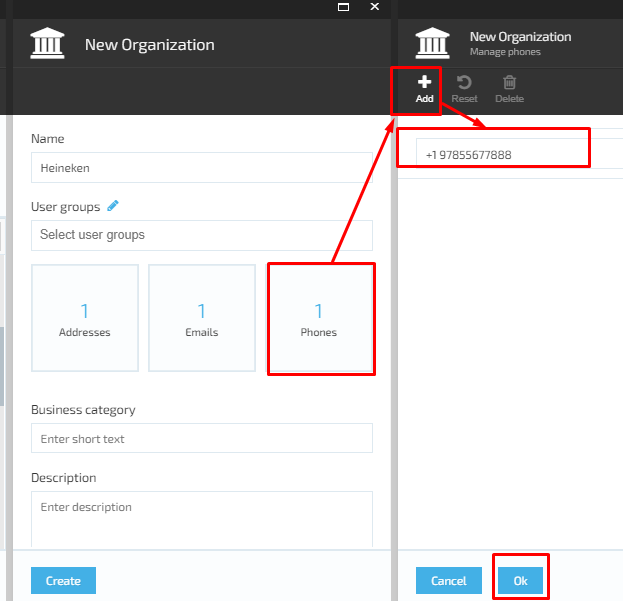
- The user selects the ‘Phones’ widget on ‘New Organization’ screen and clicks ‘Add’;
- The system will display the required email input text field;
- The user enters the phone number and clicks ‘OK’;
- The system will add the entered phone and display it on the 'Manage phones' screen.
Last update:
February 1, 2024