Manage Contacts
Add A New Contact
- The user browses the Contacts Module-> clicks ‘Add’ and selects ‘Contact’;
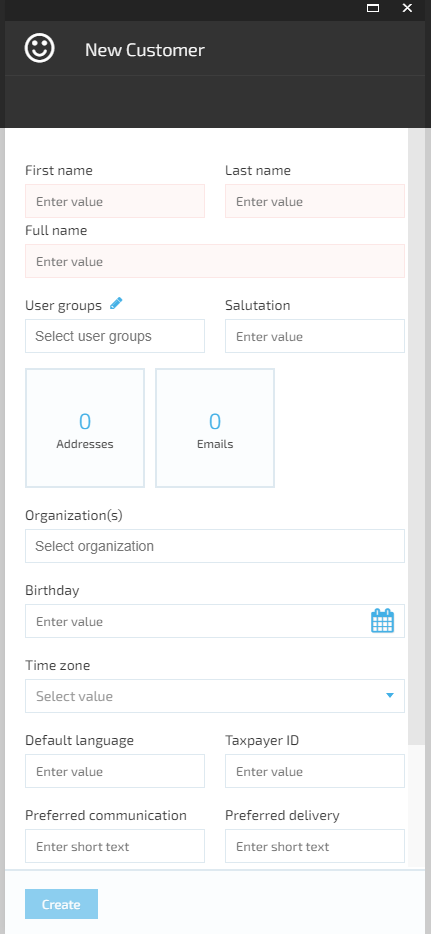
- The system will open the ‘New Customer screen that displays the following fields and widgets:
- First name field- required;
- Last name field- required;
- Full name field- required;
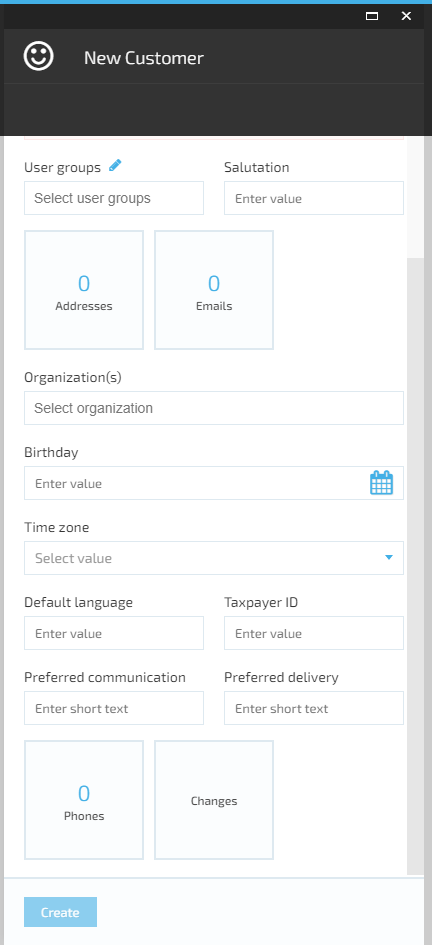
- User groups drop down. The user can select one of the options available or add a new user group;
- Salutation field;
- Organizations drop down;
- Birthday date picker;
- Time zone drop down;
- Default language field;
- Taxpayer ID;
- Preferred communication;
- Preferred delivery;
- Widgets:
- Addresses;
- Emails;
- Phones;
- Changes.
- ‘Create’ button disabled by default.
- The user fills out the form and clicks the ‘Create’ button, which becomes active when all required fields are filled out;
- The system will create the new Contact;
- If the customer belongs to an Organization, his name will be displayed inside the Organization;
- If the customer does not belong to any Organization, his name will be displayed on the Contacts & Organizations list when the Contacts Module is browsed.

Edit Contact Details
- The user opens the Contacts Module and selects the Contact;
- The system will open the Contact details in editable format;
- All fields and widgets are editable;
- The system displays additional widgets: 1. Accounts; 1. Dynamic properties; 1. Changes; 1. Indexing.
- The user makes the editing and saves the changes;
- The system will save the changes and display the updated Contact.
Last update:
February 1, 2024