Scenarios
In order to view and manage Orders in the ‘Orders Module’ the user shall be assigned to the ‘Order’ role with a certain set of permissions.
Add Role and Permissions
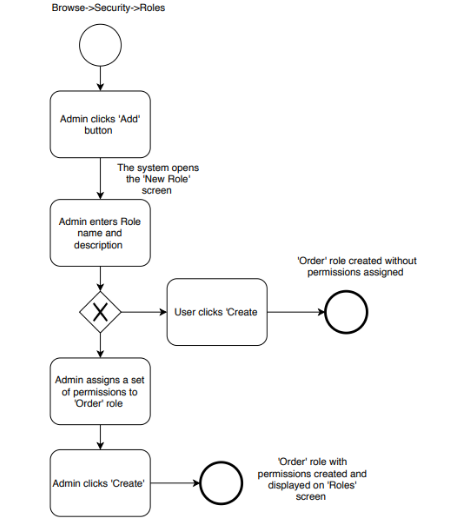
- The admin navigates to browse->Security->Roles.
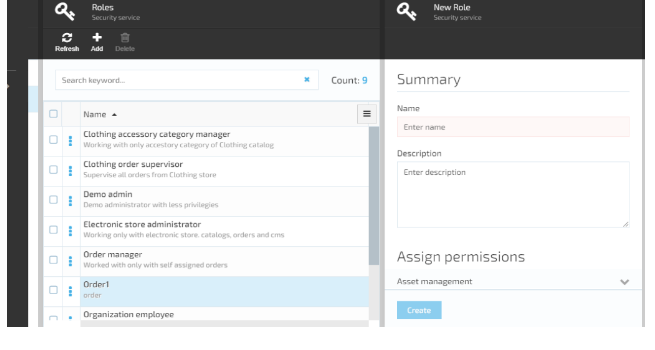
- The system displays the ‘Roles’ screen.
- The admin clicks the ‘Add’ button to create a new role.
-
The system displays the ‘New Role’ screen that contains the following elements:
- Name input field;
- Description input field;
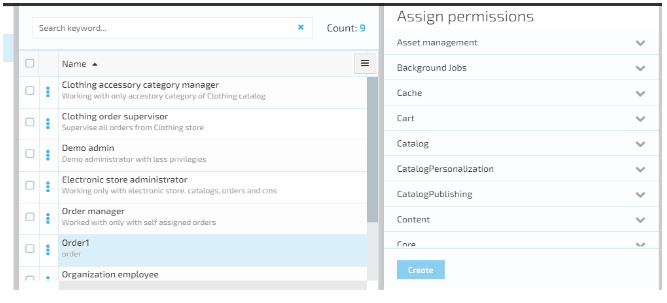
- List of permissions. Each set of permissions contains:
- Permission name;
- Sectable list of permissions.
-
The admin fills out the fields, assigns permissions to the new role and clicks the ‘Create’ button.
- The new role with permissions is created.
Important: The admin can select different set of permissions for multiple roles related to Orders Module. Roles can be edited and deleted. Permissions can be edited or removed from the role.
Assign Order Role to User
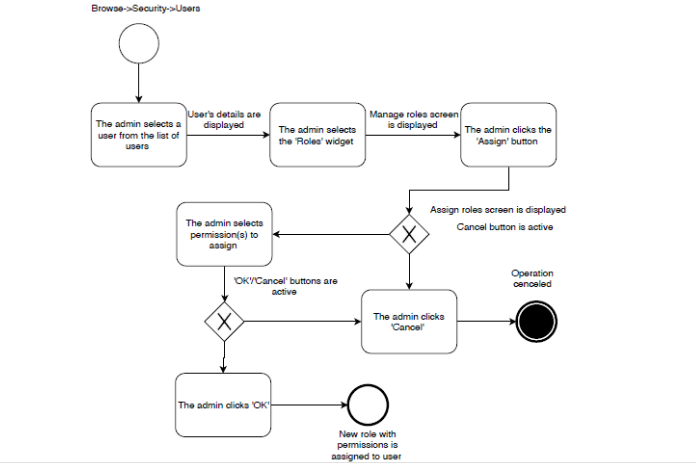
- The admin navigates to Browse->Security->Users and selects a user.
- The system displays the user details.
- The admin selects the Roles widget that can be either empty or contains the roles previously assigned to the selected user.
- The admin clicks the ‘Assign’ button to assign a new role to the user.
- The admin selects the role(s) and confirms the selection by clicking the ‘OK’ button.
- The system will assign the selected role to the user.
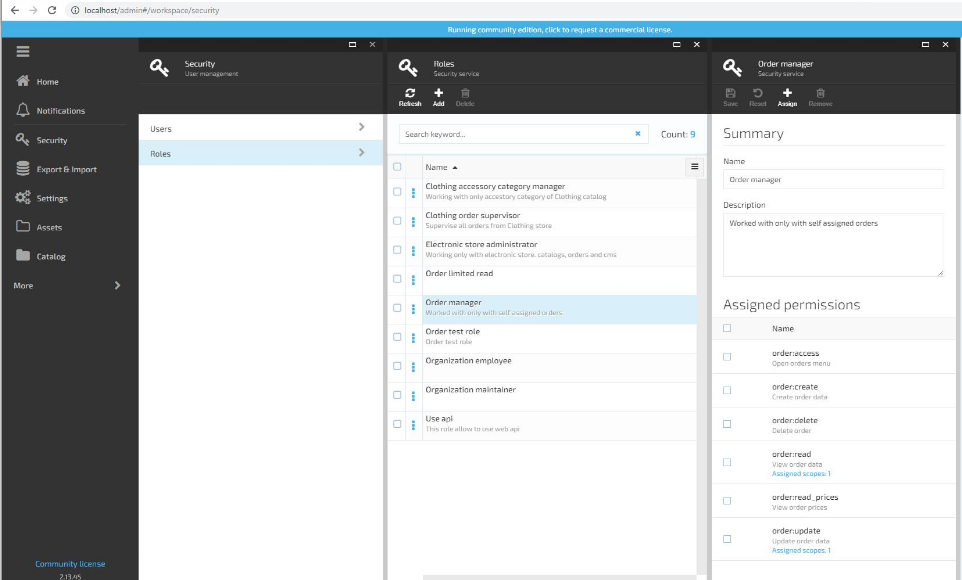
Assign Permissions to Order Manager role
- The admin navigates to Browse->Security->Roles and selects the 'order manager' role
-
The system will display the 'Order manager' blade :
-
Summary
- 'Name';
-
'Description'.
- Assigned Permissions (list with check boxes):
-
order:access (open orders menu);
- order:create (create order);
- order:delete (delete order);
- order:read (view order data);
- order:update (update order data).
-
-
The admin enters the order manager name, description and selects the permission(s) that will be assigned to the role.
- The assigned permissions will be applied to the 'order manager' role.
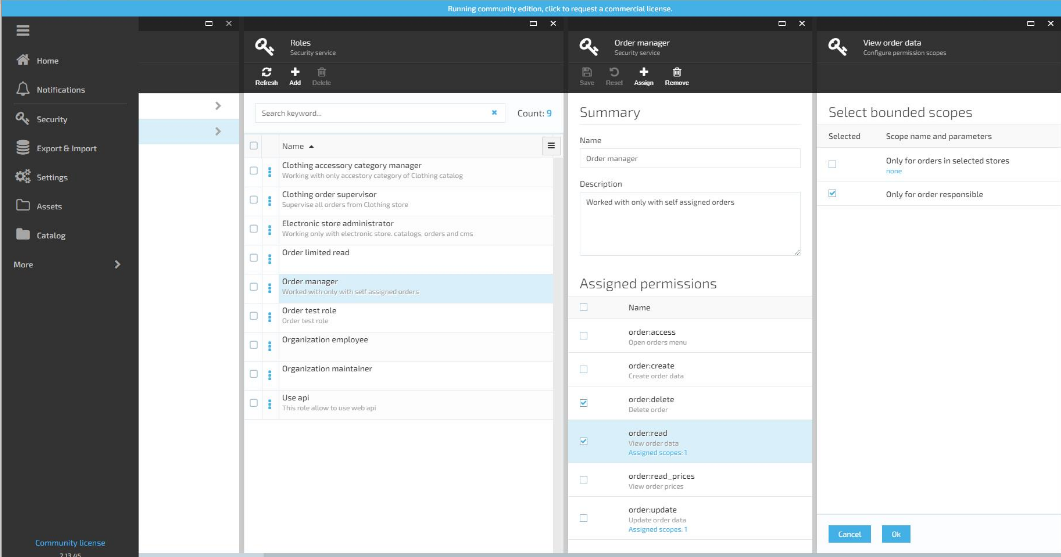
Assign bounded scope to 'order manager' role
- The admin selects the permission(s) assigned to the 'order manager' role.
-
The system will open the next blade - 'View order data' and prompt the user to configure permissions scope.
-
The admin selects one of the following options or both:
- Only for orders in selected stores;
- Only for order responsible.
-
If 'Only for orders in selects stores' option is selected, the system will open the next blade and prompt the admin to choose the store(s).
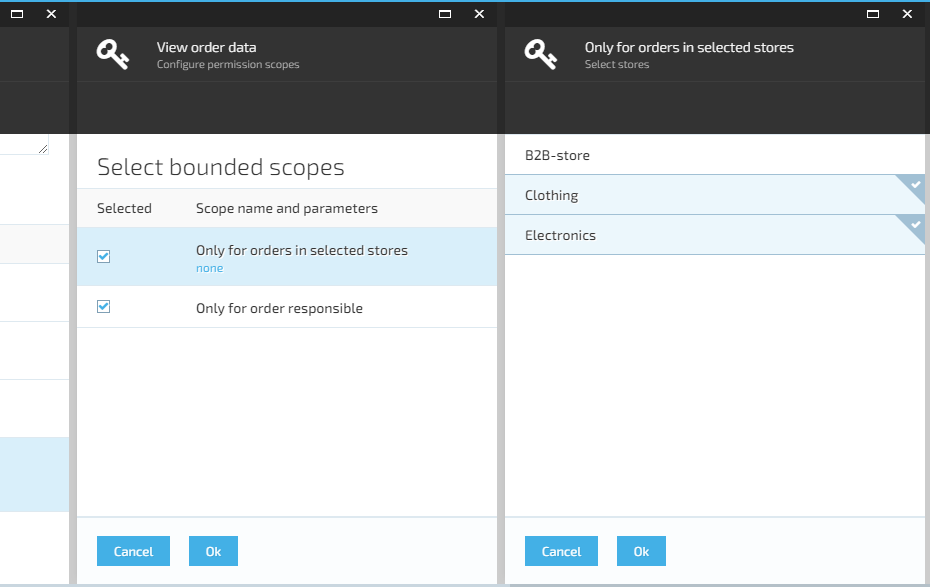
- The admin selects the store(s) and confirms selection by clicking the 'OK' button.
- The assigned permissions and bounded scope will be applied to the 'order manager' role.