Add New Store
The user can add as many new stores as necessary. In order to add a new store using VirtoCommerce platform, the user should go through the following steps:
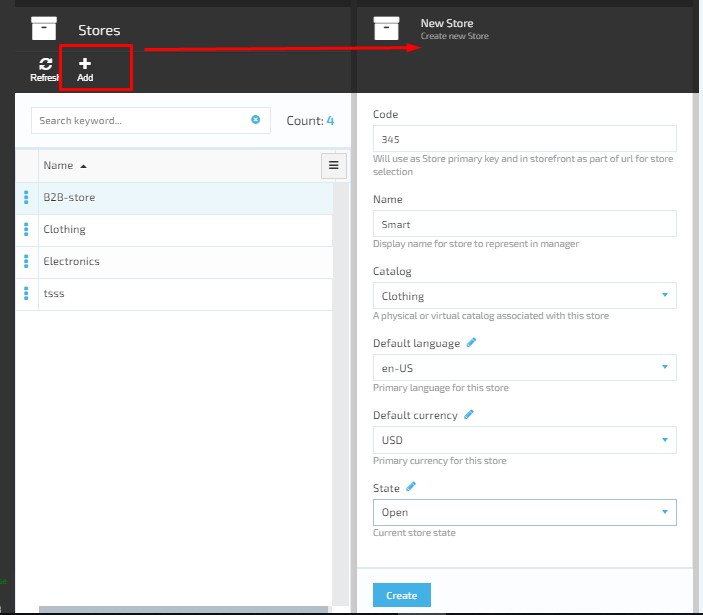
- The user opens the ‘Stores’ Module and clicks the ‘Add’ button;
- The system will display the ‘New Store/create new store’ blade:
- ‘Code’ - required field. This code is used as store primary key and on storefront as a part of the URL for store selection;
- ‘Name' - required field. The Store name is displayed for representing the Store in Manager;
- ‘Catalog’ drop down – required. Physical or virtual catalog associated with this store;
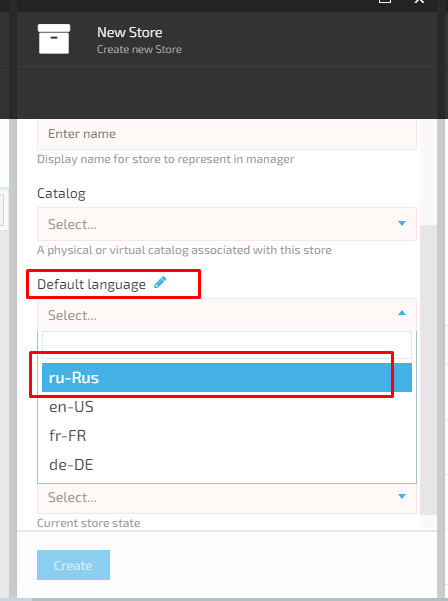
- ‘Default Language’ drop down - required. Primary language for the store;
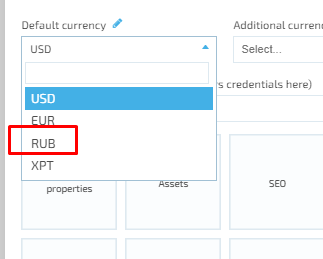
- ‘Default currency’ drop down – required. Primary currency for this store;
- ‘State’ drop down - required. Describes the current store state;
- ‘Create’ button is disabled by default.
- The user fills out the form and clicks the ‘Create’ button;
- The system will create the new store and display it on the ‘Stores’ blade.
Add State
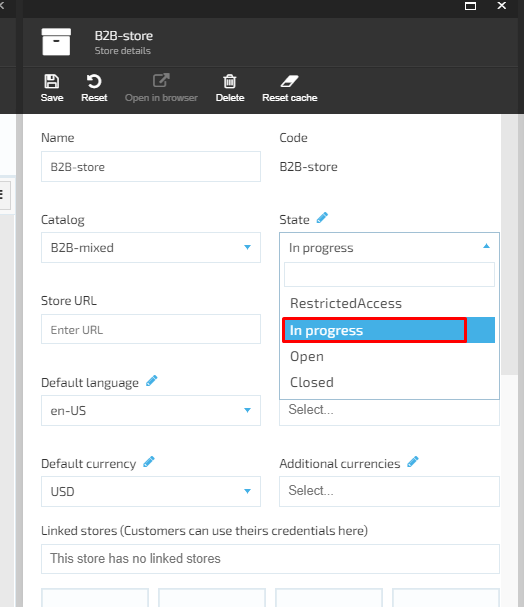
The system displays three states in the drop down that the user can select: Restricted Access, Open, Closed. These are default values provided out-of-the-box. If the user wants to add a new state, he should go through the following steps:
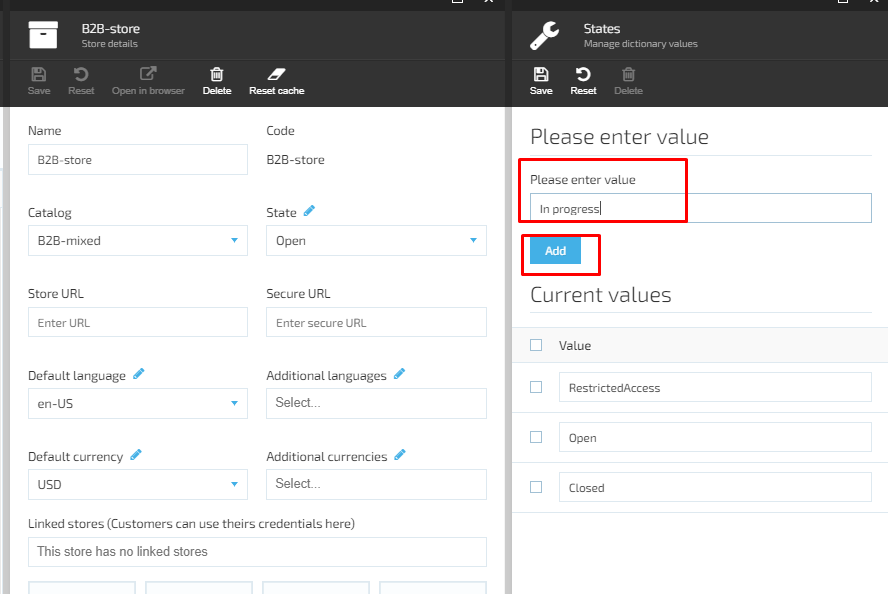
- Select ‘State’ and click on the ‘Edit’ icon;
-
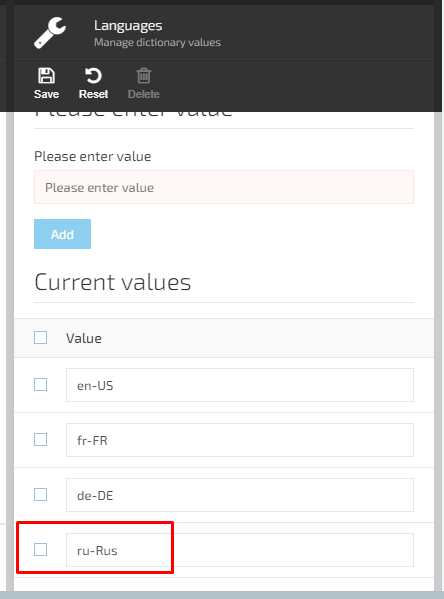
The ‘Manage dictionary values’ screen will be displayed:
- ‘Please enter value’ field - required;
- ‘Add’ button is disabled until the value is added;
- List of current values.
- The user enters the value name and clicks the ‘Add’ button;
- The new value will be added to the current values list;
- The user clicks ‘Save’ to save the changes;
- The new value will be saved and displayed in the drop down.
Add Language
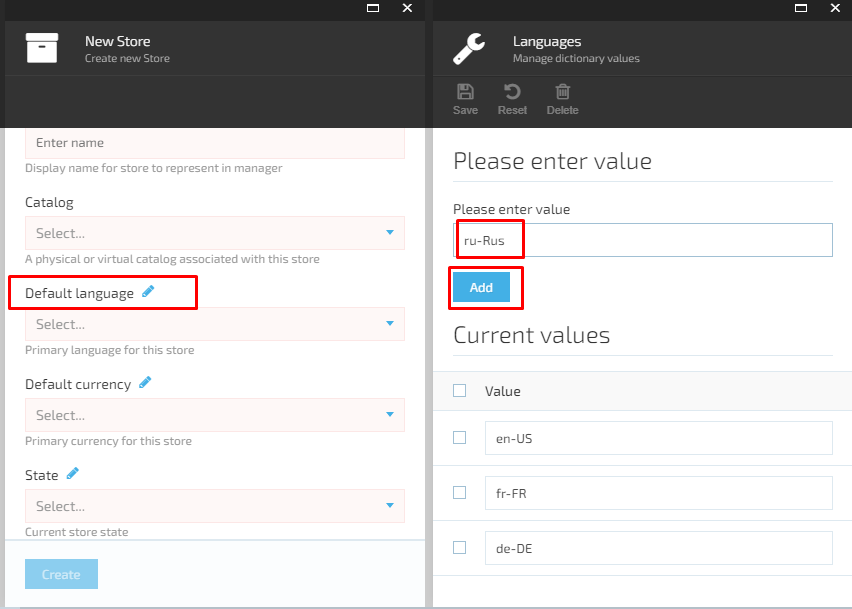
- Select ‘Default language’ and click on the ‘Edit’ icon;
-
The ‘Manage dictionary values’ screen will be displayed:
- ‘Please enter value’ field - required;
- ‘Add’ button is disabled until the value is added;
- List of current values;
- The user enters the value name and clicks the ‘Add’ button;
- The new value will be added to the current values list.
- The user clicks ‘Save’ to save the changes;
- The new language will be saved and displayed in the drop down.
Add Default Currency
In order to add a default currency to the list, the user should do the following:
- Select the currency and click on the ‘Edit’ button;
- The system will display the ‘Manage currencies’ blade with possibility to add a new currency or delete the existing ones;
- The user clicks the ‘Add’ button to add one more currency;
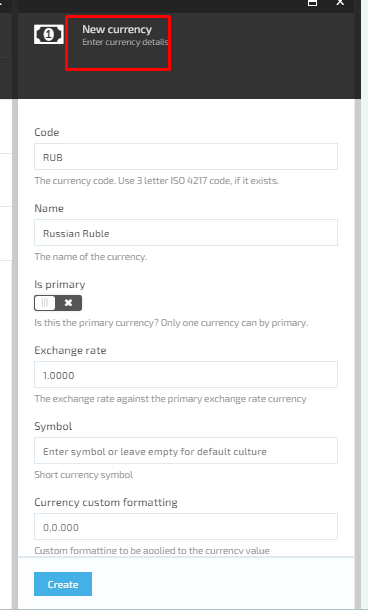
-
The system will open the ‘New currency’ blade:
- ‘Code’ field - required. The user should enter the currency code;
- ‘Name’ field - required. The user should enter the currency name;
- ‘Is primary’ button;
- ‘Exchange rate’ field;
- ‘Symbol’ field;
- ‘Currency custom formatting’ field;
- ‘Create’ button is disabled by default.
- The user fills out the form and clicks the ‘Create’ button;
- The system will create the new currency and display it on the list;
- The new currency will be displayed in the drop down under ‘Default currency’.
- In order to select a default currency that will be displayed on the store, the user should switch on the ‘Is primary’ button on ‘Edit currency details screen.
[

Last update:
February 1, 2024