Footer Integration
In this article, we will integrate Footer with the Builder.io CMS. The integration will allow you to create and manage footer sections and navigation links in the Builder.io CMS and display them in the Virto Commerce vue-b2b-theme.
In this guide, we will:
- Create a structured data model.
- Fetch footer sections and navigation links from Builder.io and display them in the vue-b2b-theme.
Create Data Model in Builder.io
To create data model:
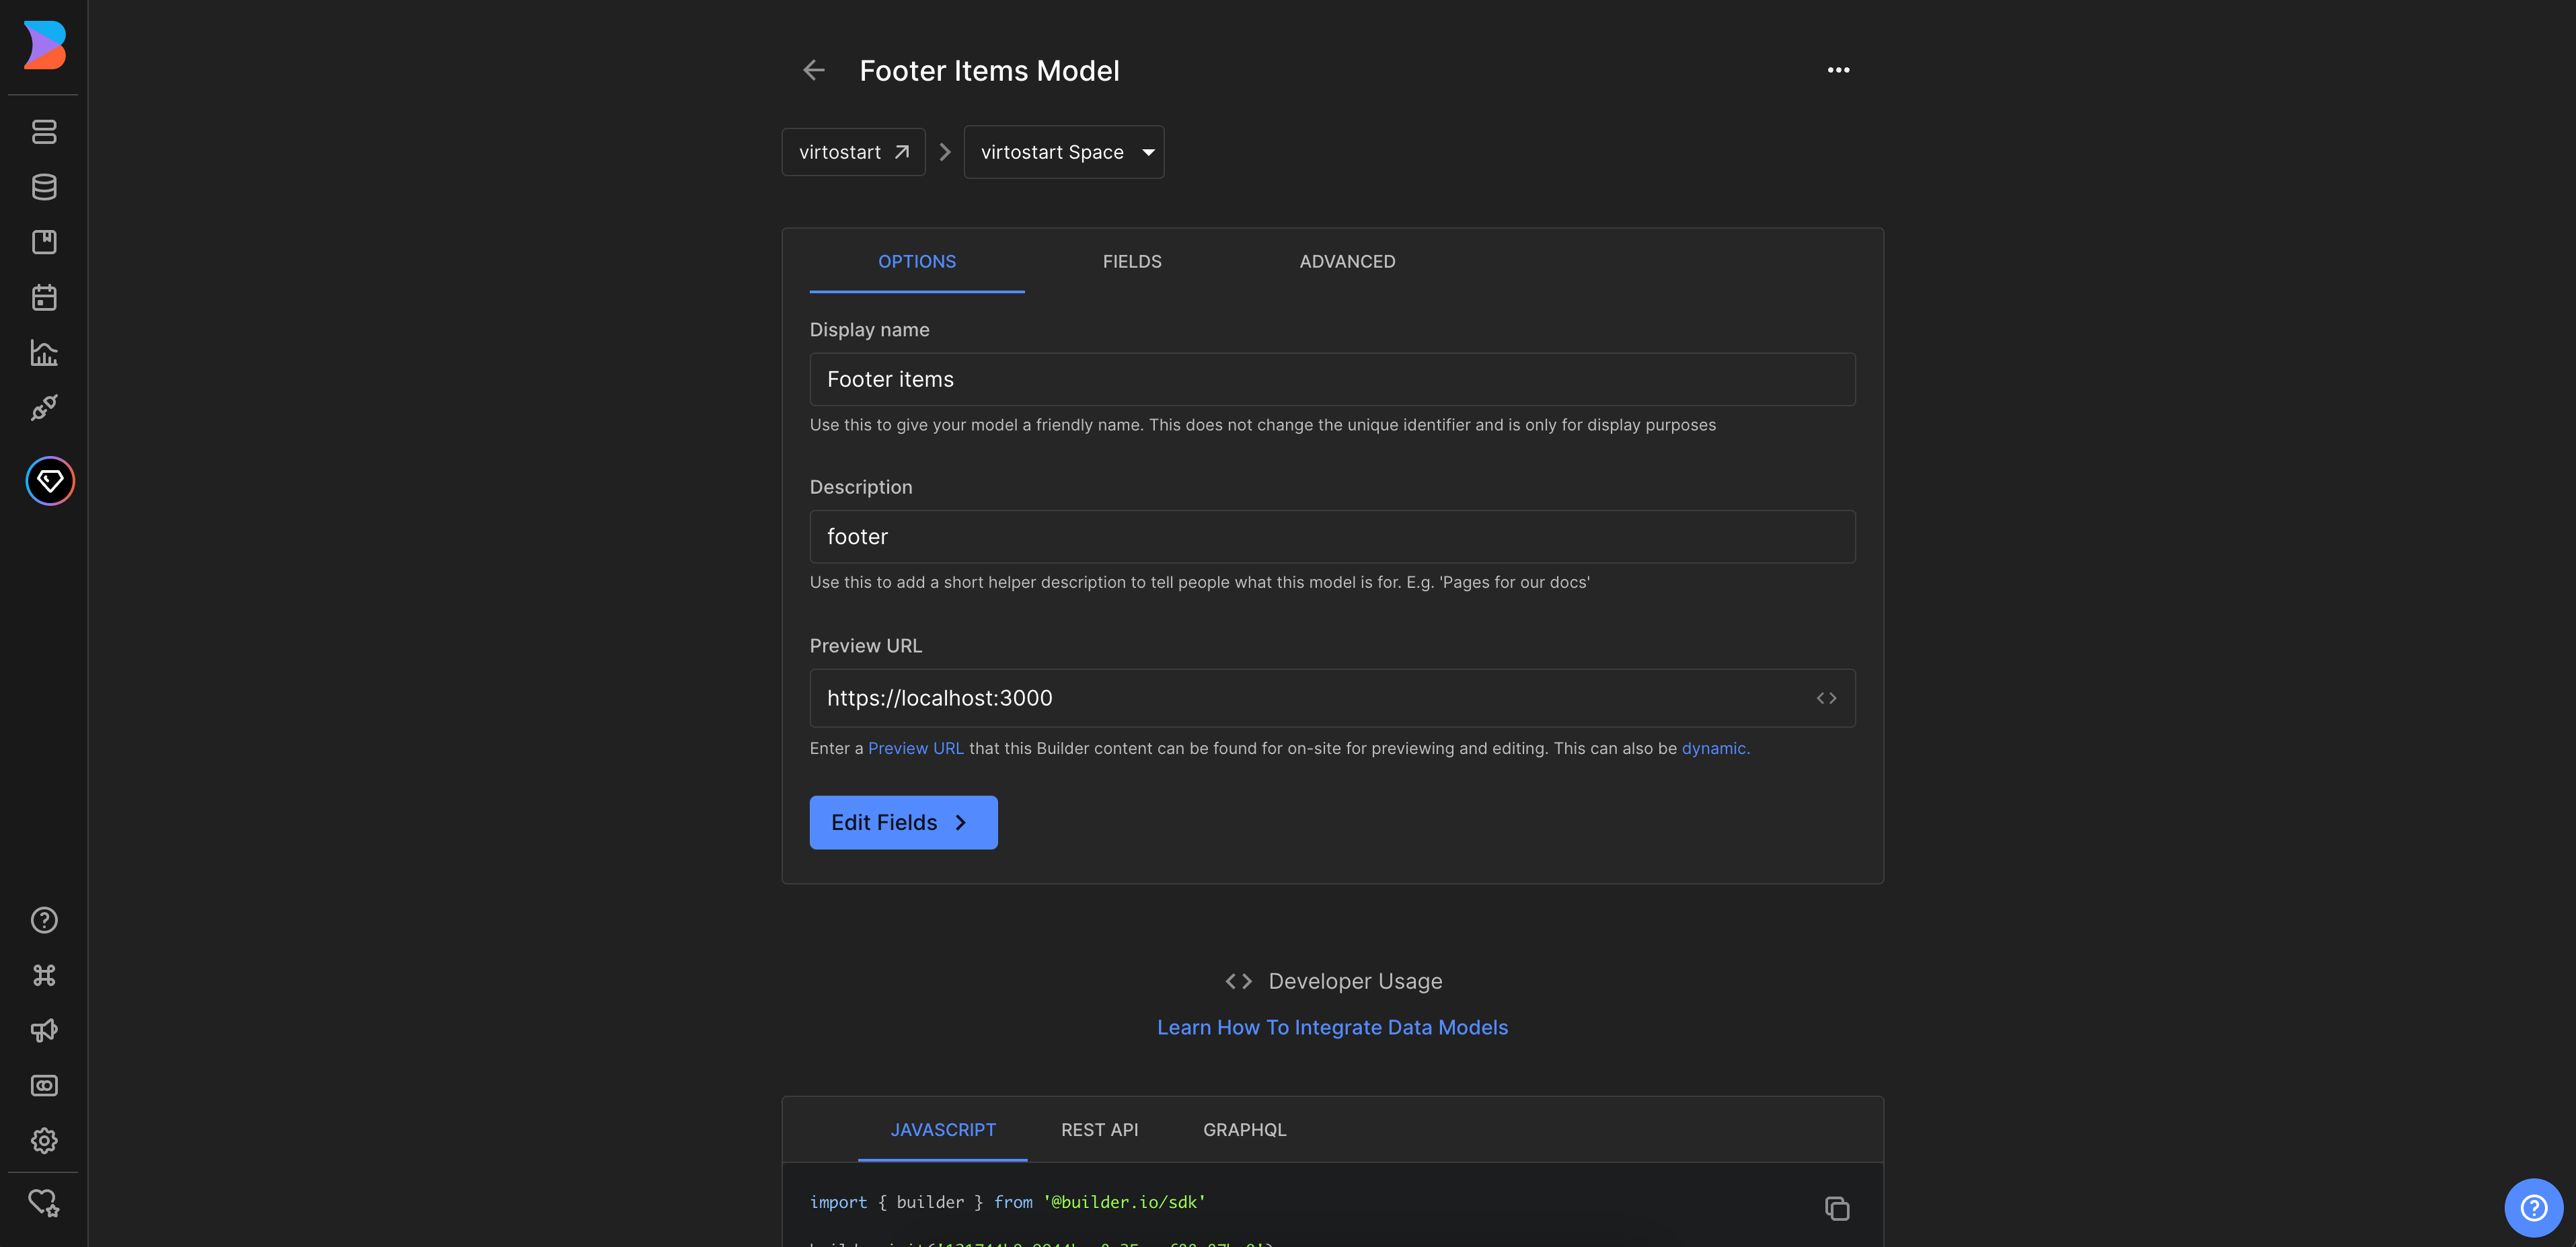
- Go to the Models menu and click Create Model in the top right corner.
- Select the model type from the dropdown list. We select Data.
- Enter the name of the component and its description. We enter Footer items.
-
Change preview URL to http://localhost:YOUR_PORT where YOUR_PORT is the port of your Virto Commerce vue-b2b-theme application.
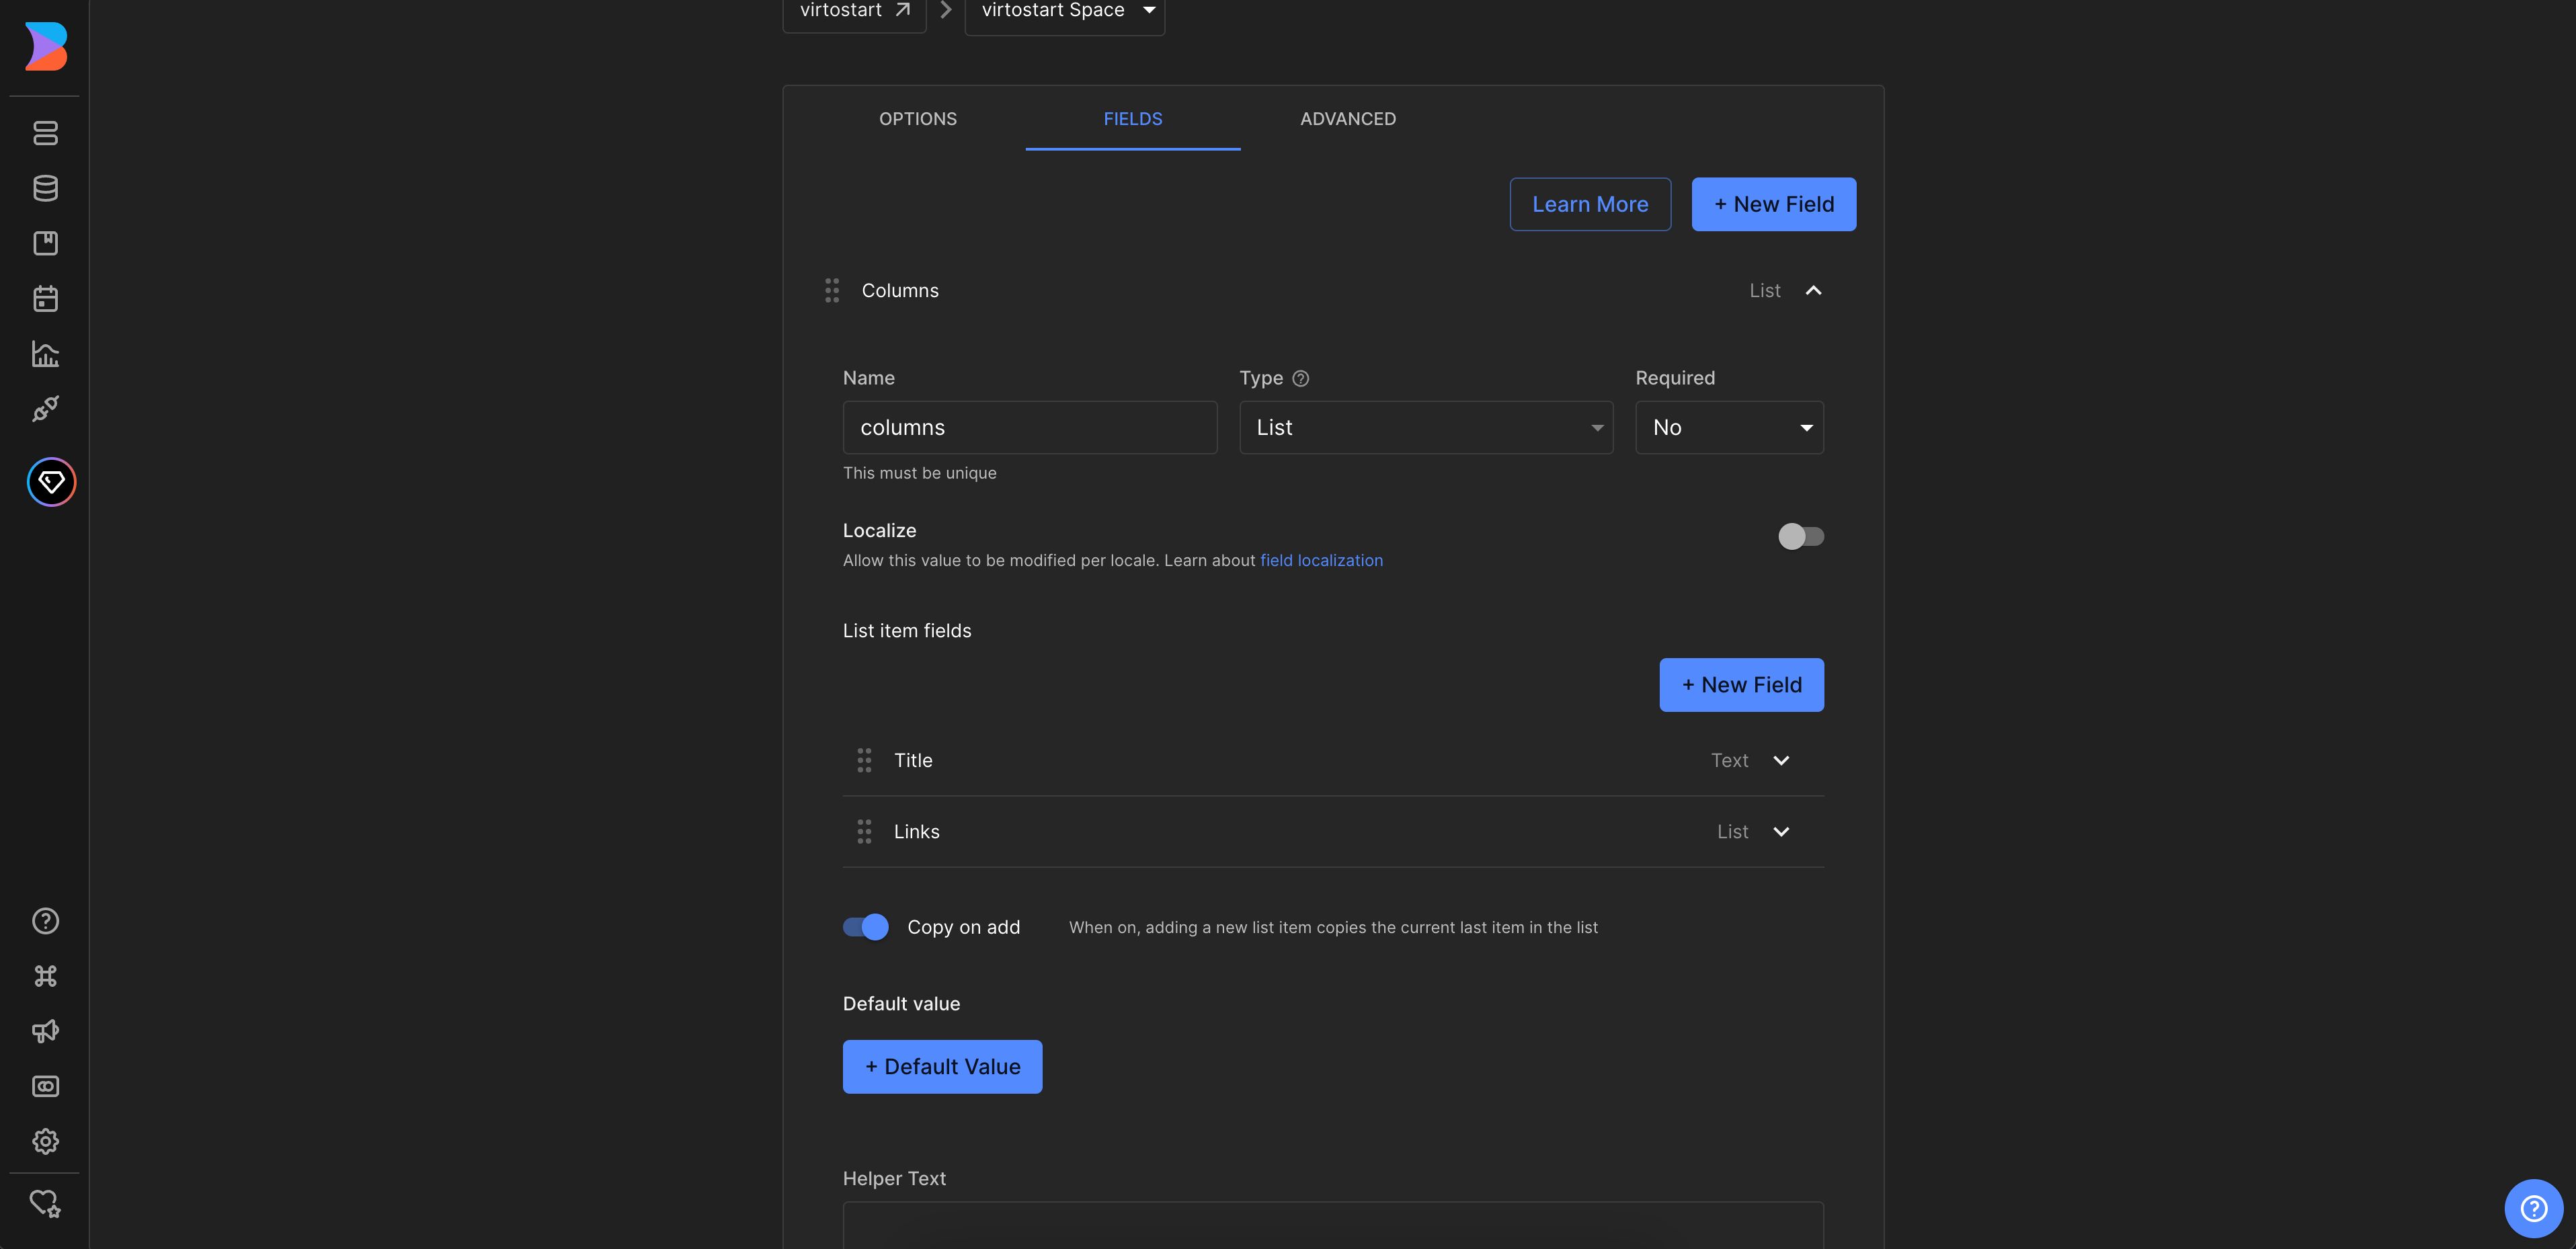
-
Set up the actual field in the entry that holds our component. In our example, we click Fields and add a new field called columns of the type List. This field will hold the columns of the footer. Similarly, we add new fields title (type Text), links (type List), which is an array. The links field holds the links of the footer. The nesting will be as follows:
Create Footer Content
To create footer content:
- Go to the Content menu and click Footer items in the Structured data models section.
- Click New Entry and select Footer items model from the dropdown list to create new footer content.
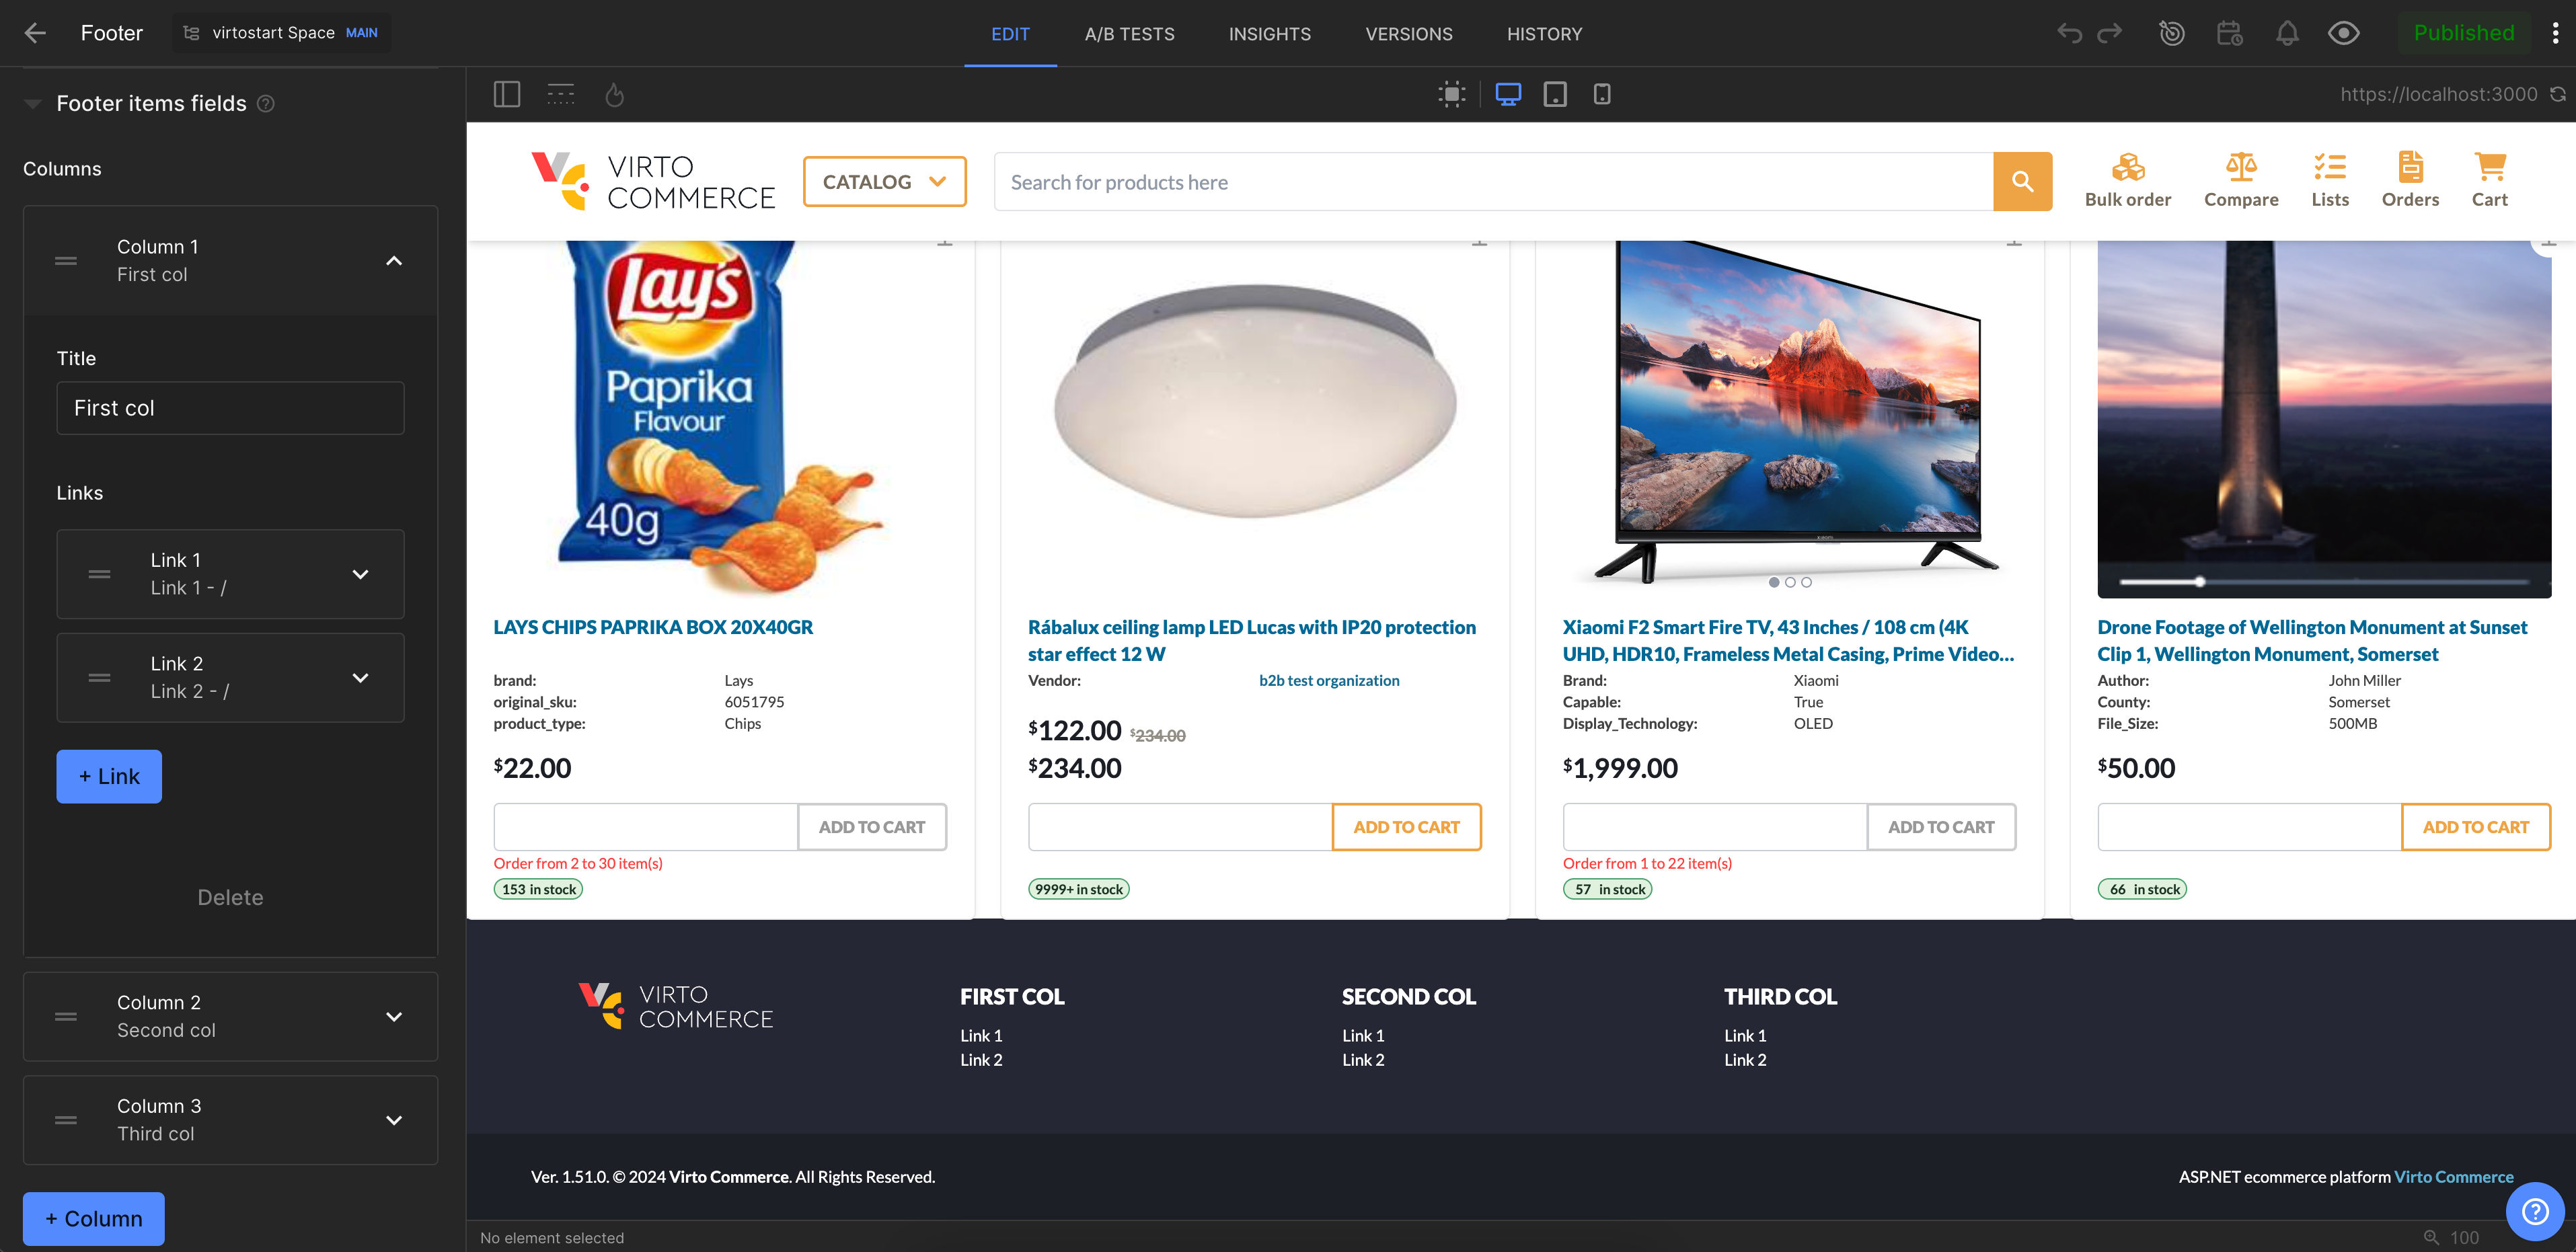
- On the new page, add the content for the footer.
- Click + Column to add columns to the footer.
-
Click + Link to add links to the footer.
Fetch Content from Builder.io and Display in vue-b2b-theme
To fetch content from Builder.io and display it in the vue-b2b-theme, go to the vue-b2b-theme and edit the vc-footer component. Remove hard-coded columns and change it to the fetched ones.
The final vc-footer component will look as follows:
<template>
    <footer aria-label="Footer">
        <!-- Top footer -->
        <div
        v-if="!compact"
        class="hidden bg-[color:var(--color-footer-top-bg)] text-[color:var(--color-footer-top-text)] md:block print:!hidden"
        >
        <div class="container mx-auto grid grid-cols-2 gap-4 p-12 lg:grid-cols-4 xl:grid-cols-5">
            <!-- Logo column -->
            <div class="hidden xl:block">
            <VcImage :src="$cfg.logo_inverted_image" :alt="$context.storeName" class="h-9" lazy />
            </div>

            <div v-for="(col, index) in columns" :key="index">
            <div v-t="col.title" class="mb-3 text-base font-extrabold uppercase text-white"></div>
            <div class="flex flex-col space-y-1">
                <FooterLink
                v-for="(link, linkIndex) in col.links"
                :key="`link_${linkIndex}`"
                v-t="link.title"
                :to="link.link"
                ></FooterLink>
            </div>
            </div>
        </div>
        </div>

        <!-- Bottom footer -->
        <!-- ... -->
    </footer>
</template>
After making the changes, the footer will now be fetched from Builder.io and displayed in the vue-b2b-theme.
Now you can publish the changes in Builder.io and see the updated footer in the vue-b2b-theme.