Register Custom Components
In this article, we will explore how to register any custom component in the Storyblok CMS. The registration of custom components allows you to use any UI components like Slider in the Storyblok CMS when creating content.
To register a custom component in the Storyblok CMS:
- Create a wrapper component for the custom component you want to register. The wrapper component should be a Vue component that renders the custom component.
- Register the component as a global component in your application. This will make the custom component available for use in the Storyblok CMS.
- Create component model in Storyblok for the custom component. The component model should define the properties of the custom component and how it should be rendered in the Storyblok CMS.
Example. Slider Component Registration
In this example, we will show how to register a Slider component in the Storyblok CMS:
-
Create a wrapper component for the
Slidercomponent:StorySlider.vue -
Register the
StorySlidercomponent as a global component in your application:
Create Component Model in Storyblok
To create component model in Storyblok:
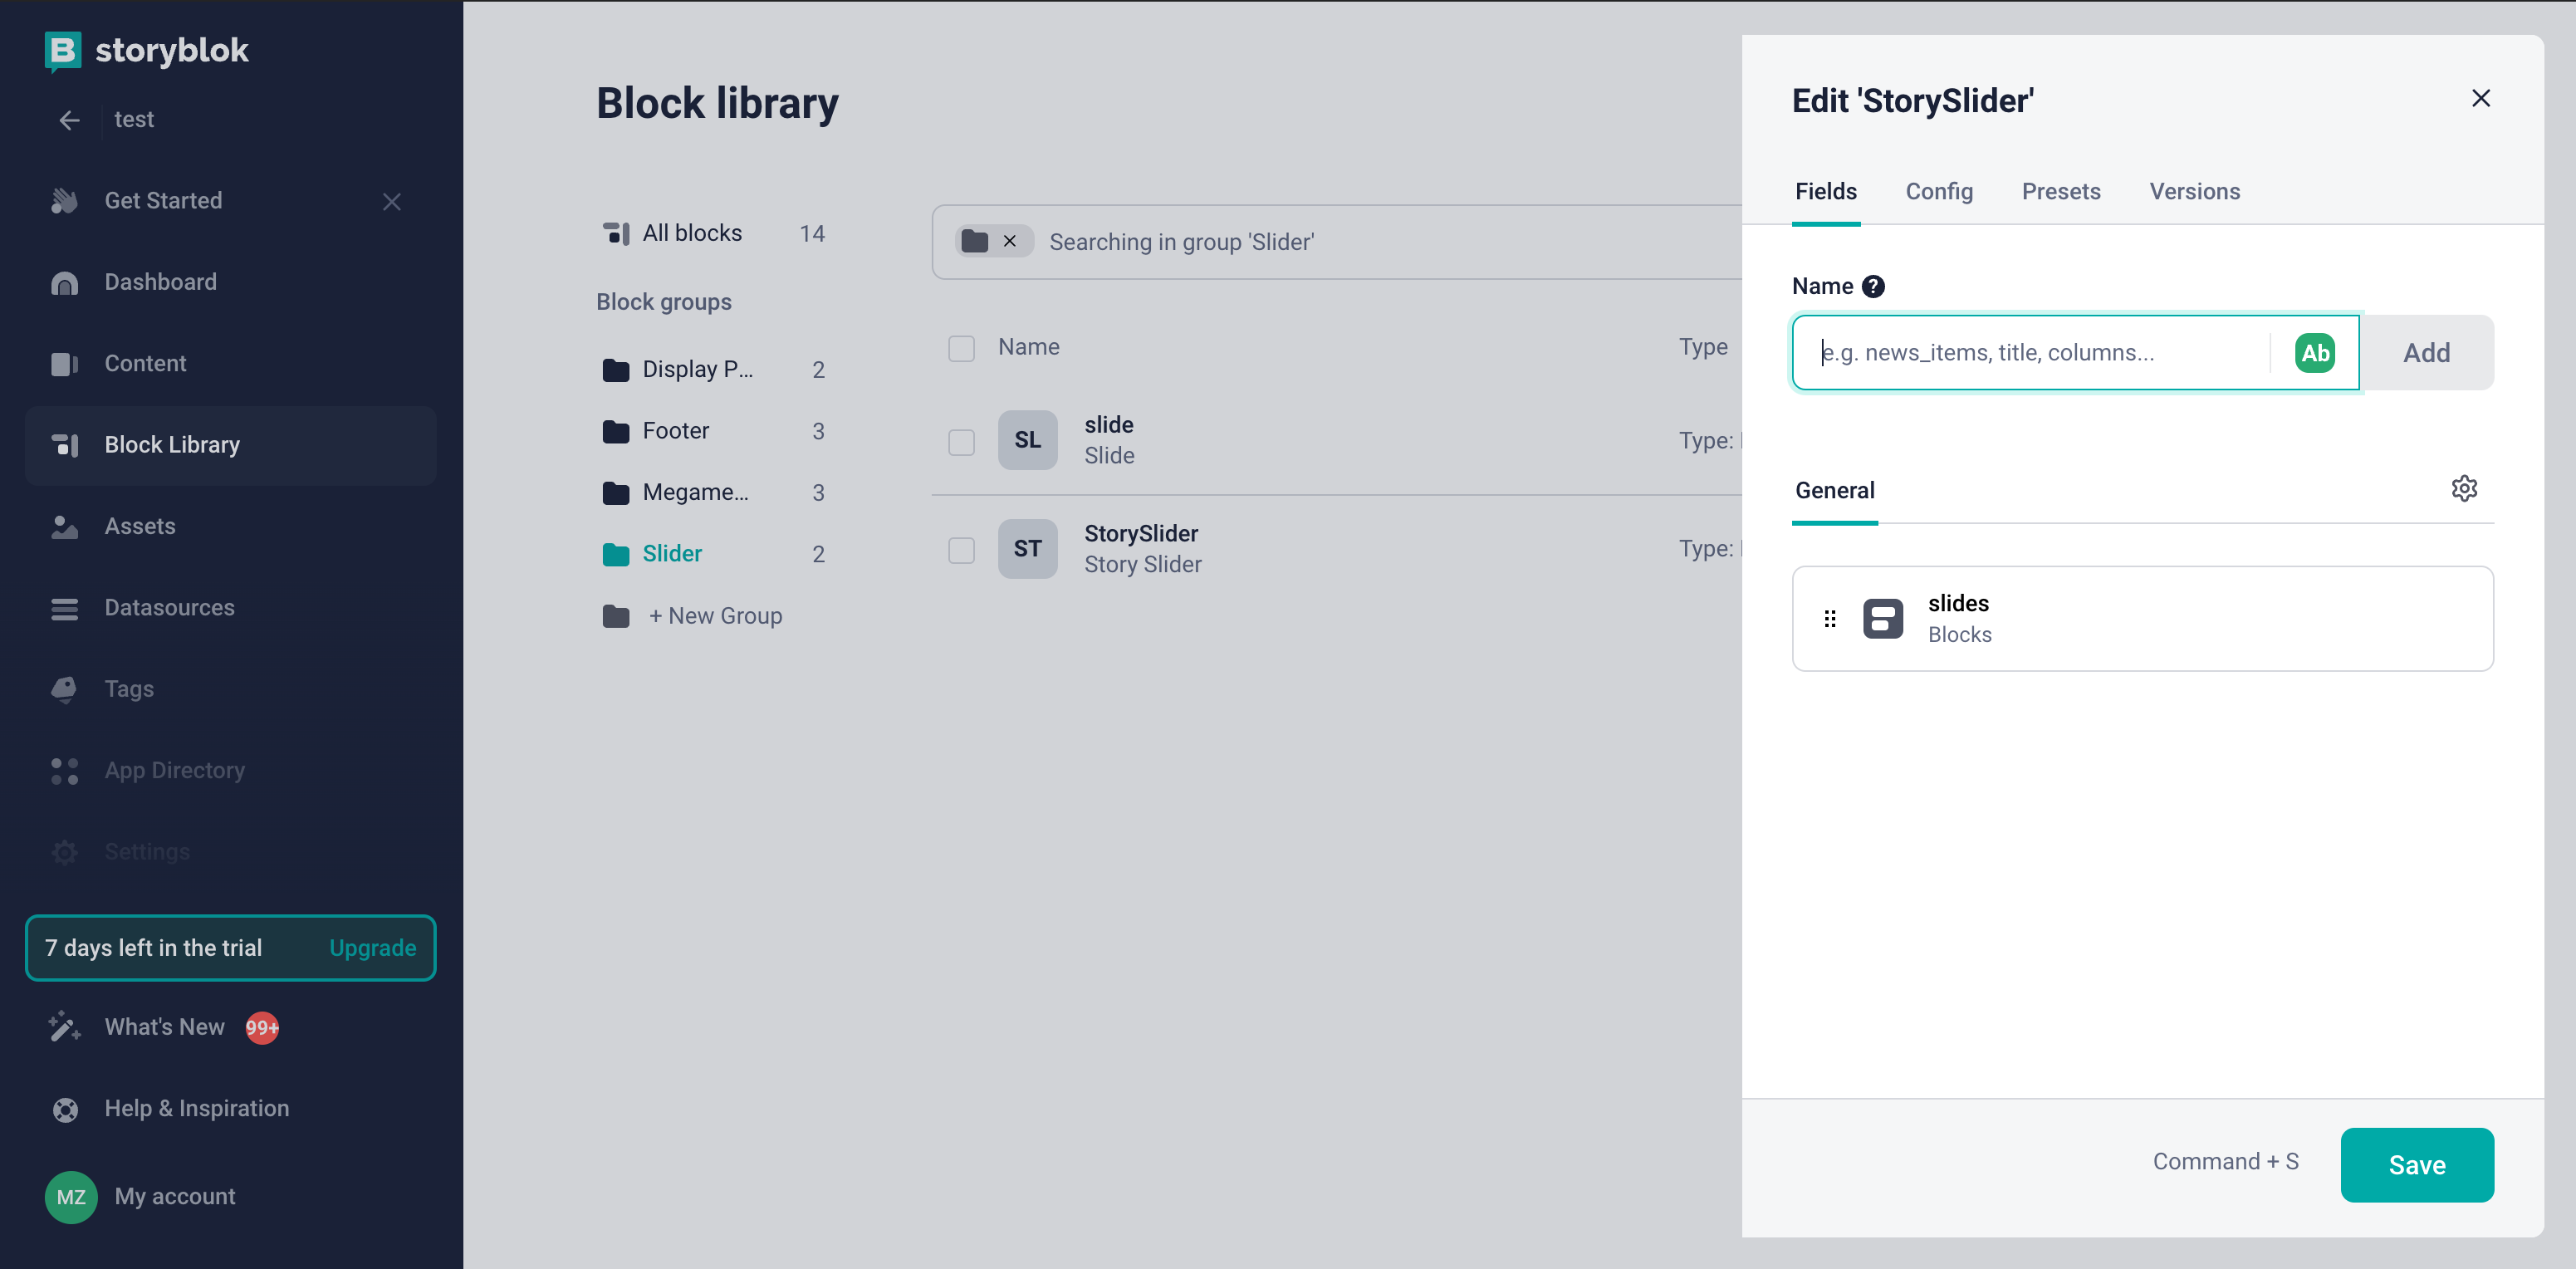
- Go to the Block Library menu and click New Block in the top right corner.
- Enter the name of the component. We will enter StorySlider.
- Add a new field called slides of type Blocks.
-
Click Save.
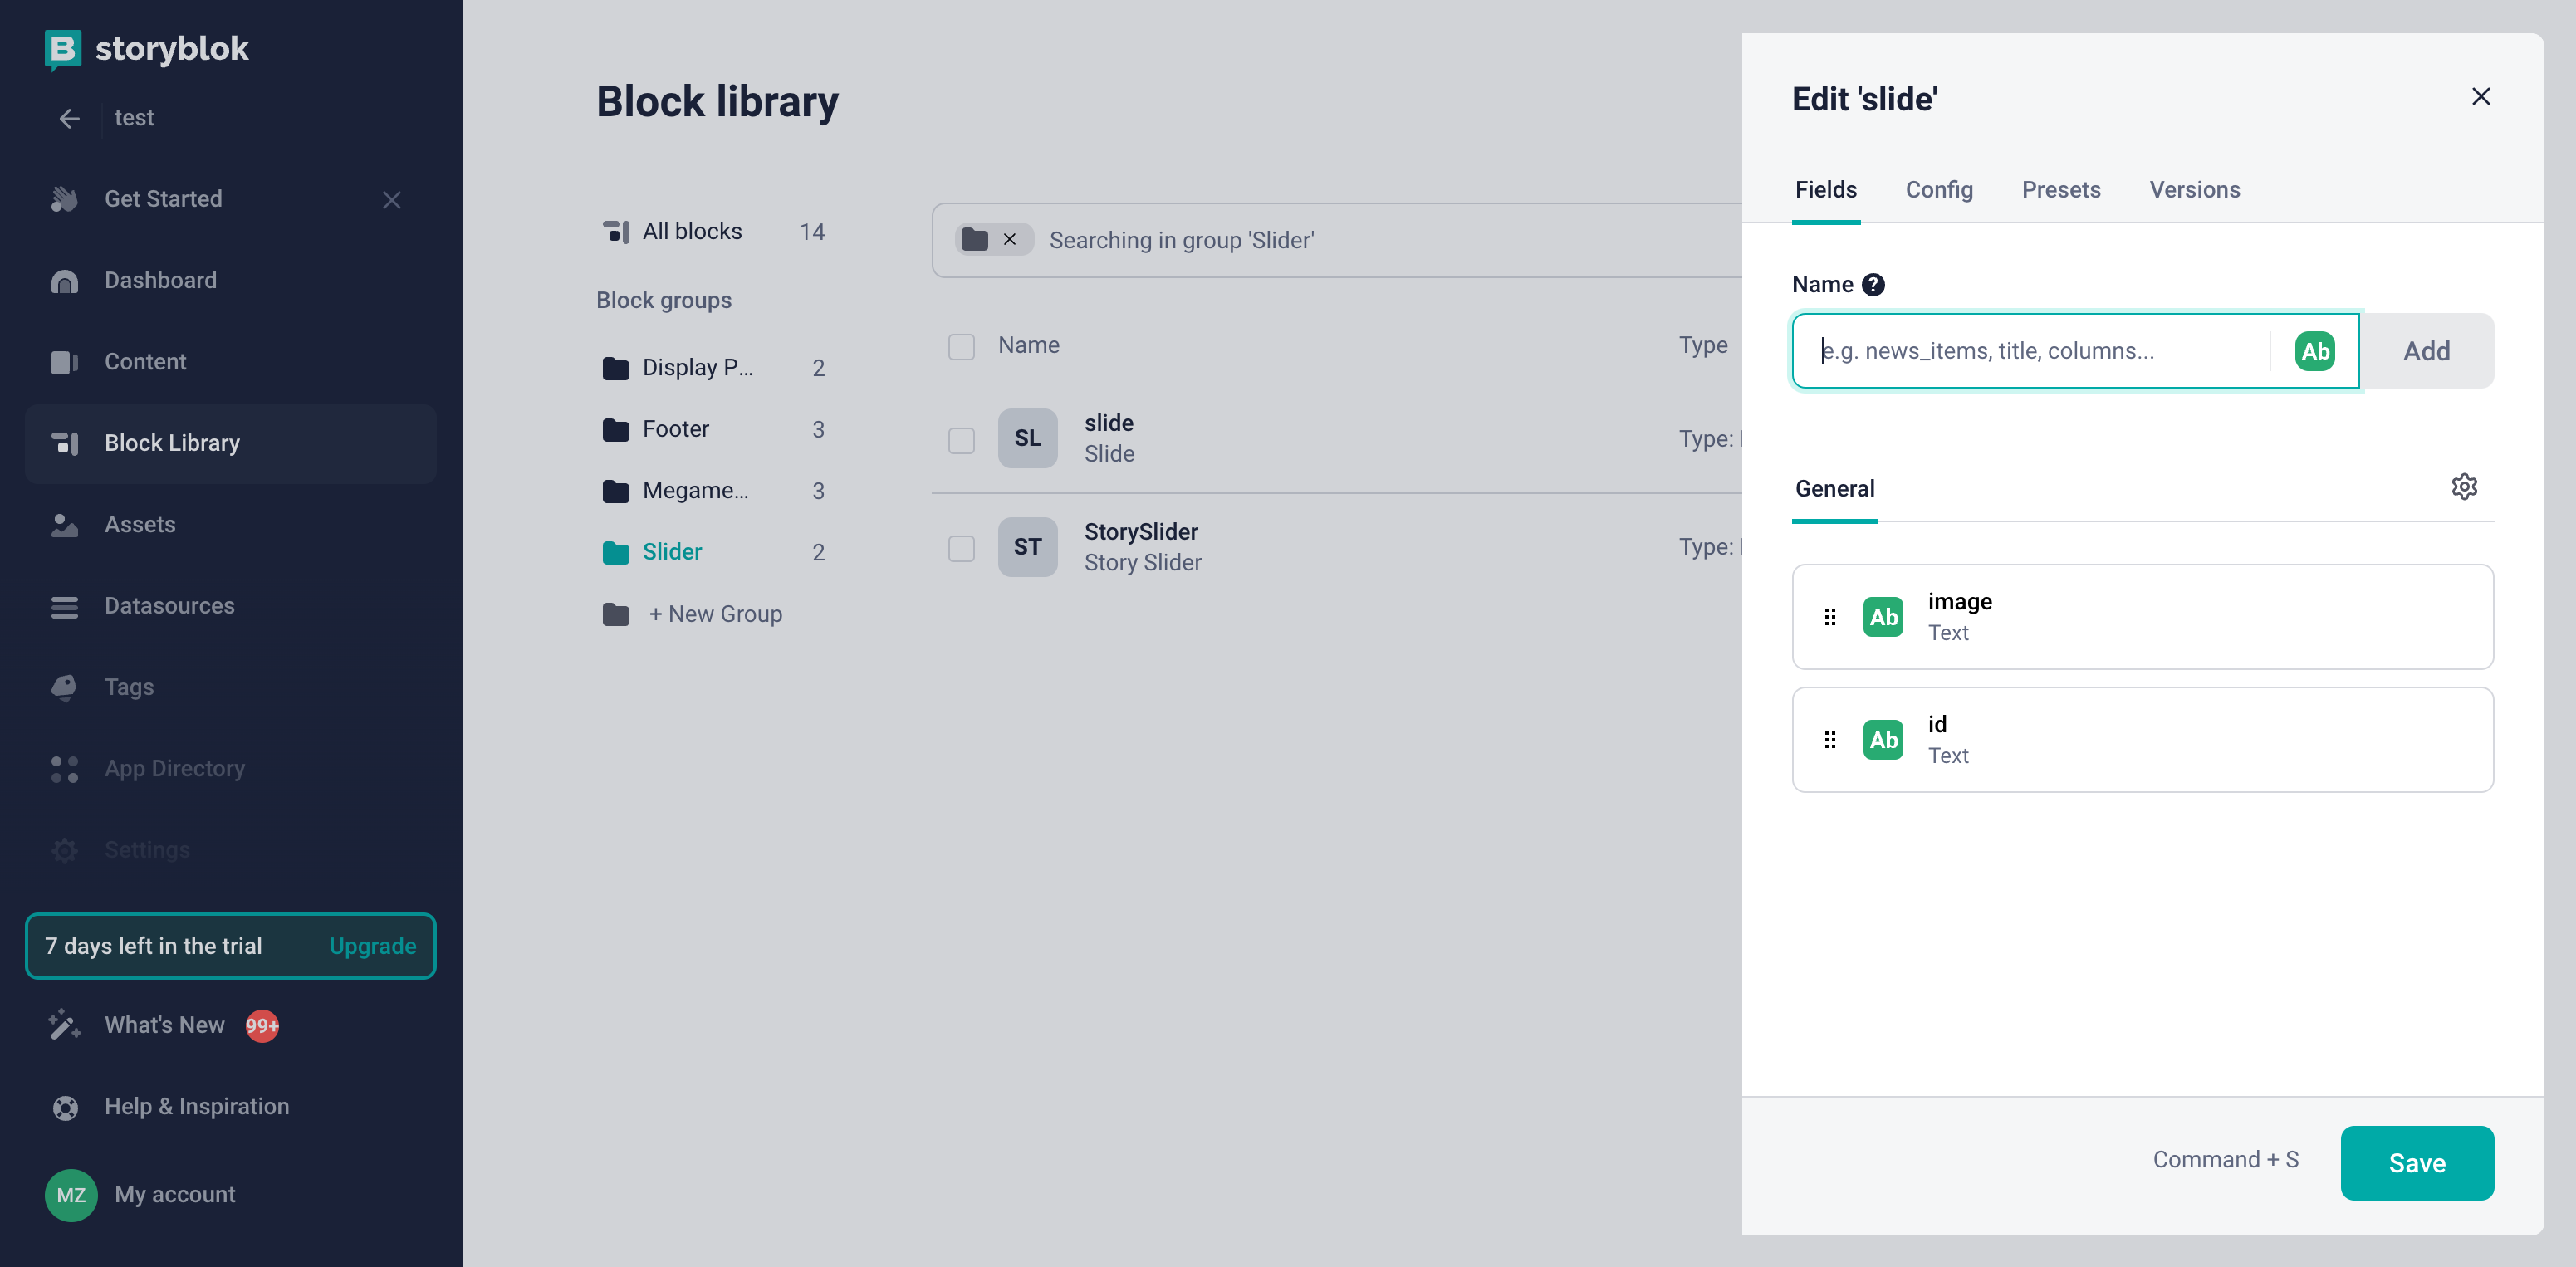
-
Since components in Storyblok have a block structure, we need to create blocks for each single slide the same way. For this, we will create the slide block of the Nestable block type. The slide block structure can be as follows:
-
Link all the blocks together to restrict the selection of external blocks that are not related to the StorySlider:
- Go to the settings of the StorySlider to find the entry slides with the type Blocks in the General section and in the Edit field section.
- Check Allow only specific components to be inserted.
-
Choose the component that can be nested in this block - slide. In our example, the nesting looks as follows:
StorySlider block configuration can be as follows:

Now you can add it to the Content page to create a new StorySlider block!