Managing Categories
Adding New Category
You can add a new category to the Catalog following these simple steps:
- Open the Catalog module and select the appropriate catalog, which will take you to the Categories and Items screen.
- Click the Add button.
-
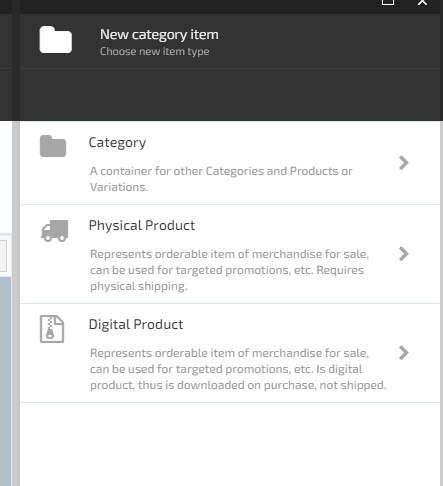
The New category item screen will show up, prompting you to choose one of these three options:
- Category
- Physical product
- Digital product
-
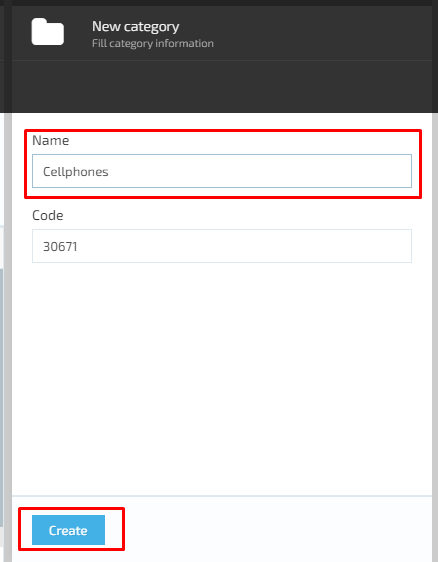
Select Category. This will open the New Category screen with the following elements:
- Name text box
- Code text box (the code is automatically generated by the system)
- Create button, which will be grayed out until you provide the category's name
- Give your category a name and click Create.
-
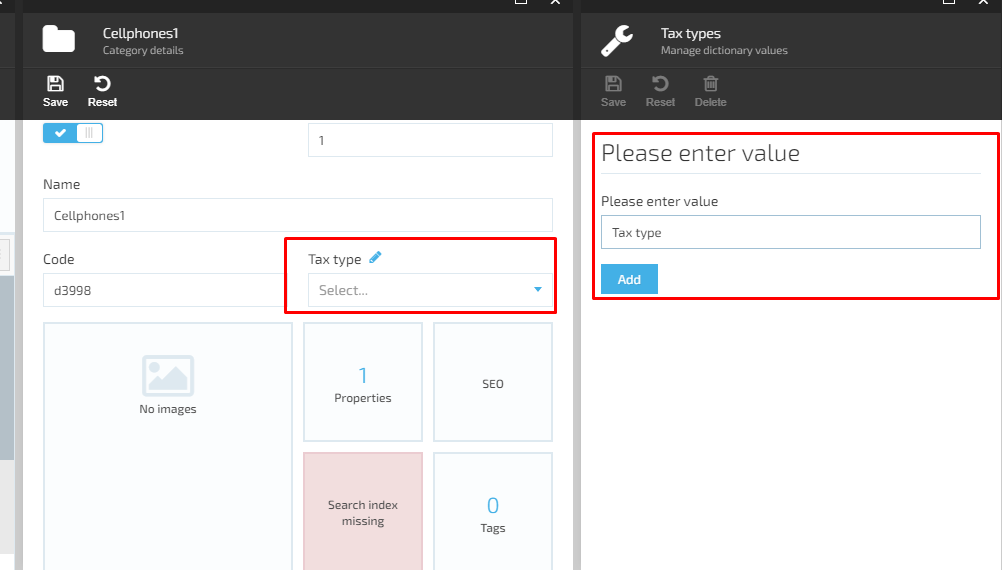
Once your category is created, the Category Details screen will show up. This screen houses the following properties:
-
Active toggle button that allows you to activate or deactivate your category
- Priority text box
- Name text box
- Code text box
- Tax type dropdown list, where you can either select a tax type value or add a new one
- Images widget
- Properties widget
- SEO widget
- Search index widget
- Tags widget
Note: You can edit Name, Tax type, and widgets, while the Code field is uneditable.
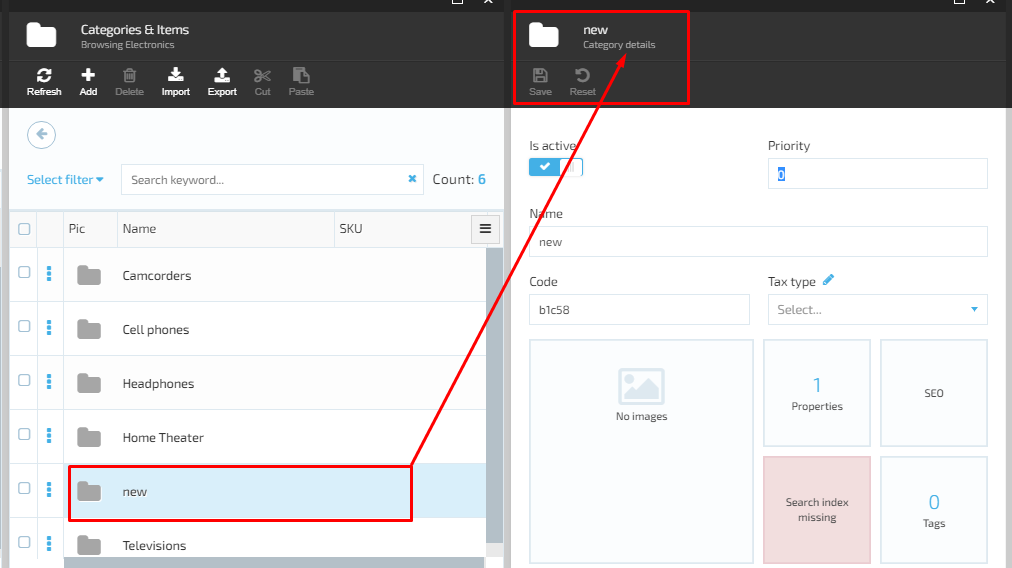
- Fill out the details, configure the widgets as you prefer, and click Save. Your new category will show up in the Categories list.
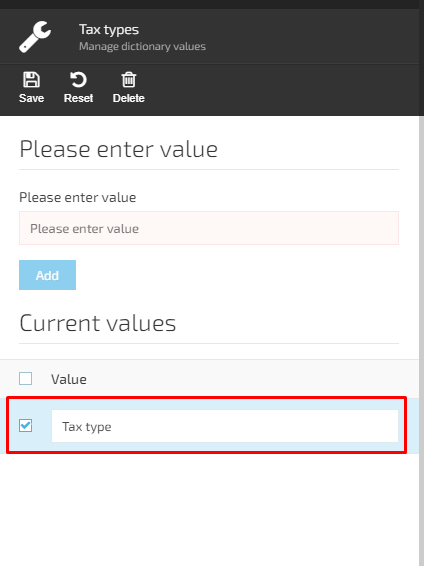
Adding Tax Type
To add a tax type value, do the following: 1. Click the Edit button on the Category Details screen, which will open the Tax Types screen. 1. Give your tax type a name and click Add. 1. On the next screen, select your newly added type from the list and click Save. 1. This is it! Your new tax type will be displayed in the Tax type dropdown list.
Note: You can add as many tax types as you deem necessary.
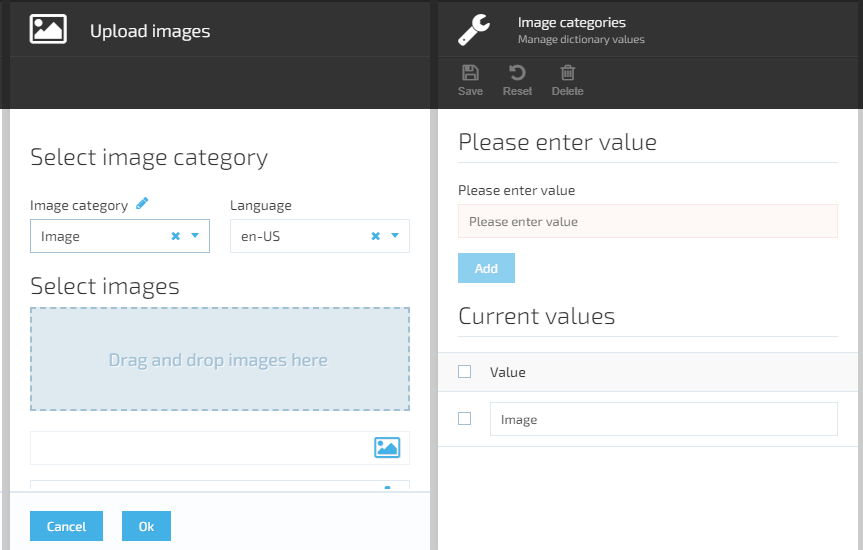
Images Widget
To add images to a category, do the following: 1. Select the Images widget on the Category Details screen, which will open the Manage Images screen. 1. Click Add. This will take you to the Upload Images screen with the following items: + Image category dropdown list, where you can also add new categories + Language dropdown list + Select images space with the Drag and drop and Browse file options 1. Specify the required details and click OK. Your image(s) and other appropriate info have now been saved to the system.
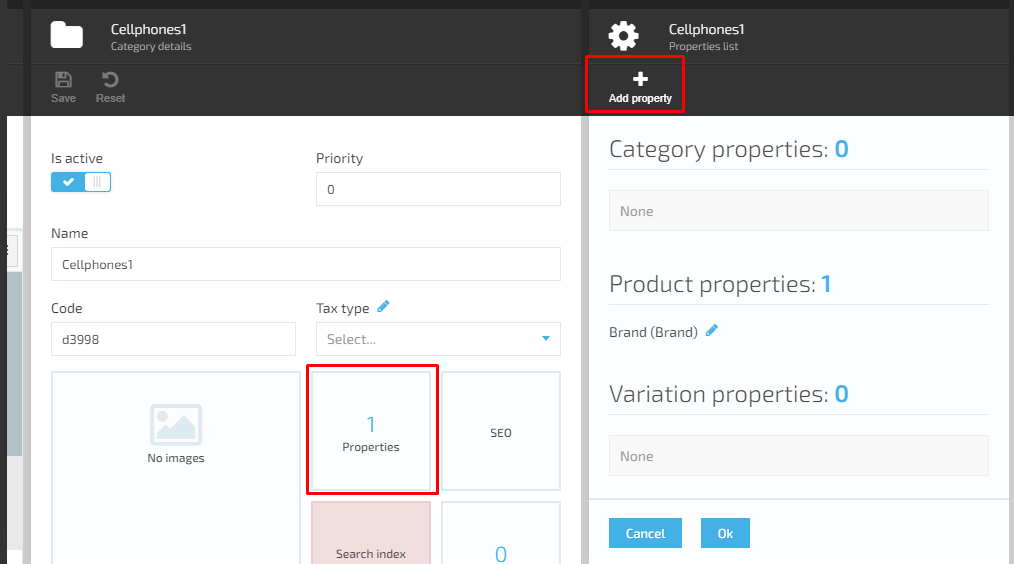
Properties Widget
To add properties to a category, follow these steps:
1. Select the Properties widget on the Category Details screen to open the Property List screen where you can add a new property.
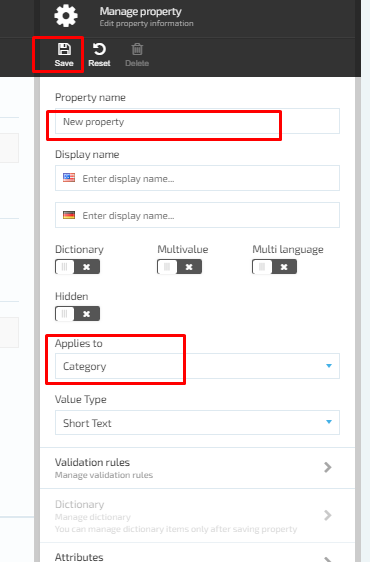
1. Click Add property. This will open the Manage property screen with the following items:
+ Property name text box
+ Display name text box
+ Toggle buttons:
+ Dictionary
+ Multivalue
+ Multilanguage
+ Hidden
+ Applies to dropdown list with these options:
+ Category
+ Product
+ Variation
+ Value type dropdown list with these options:
+ Short text
+ Long text
+ Decimal number
+ Date time
+ Boolean
+ Integer
+ Geo Point
1. Specify the information based on your needs and save your changes. The new property will be added to the Category.
Managing Validation Rules
You can manage the validation rules for all the category properties following these steps:
-
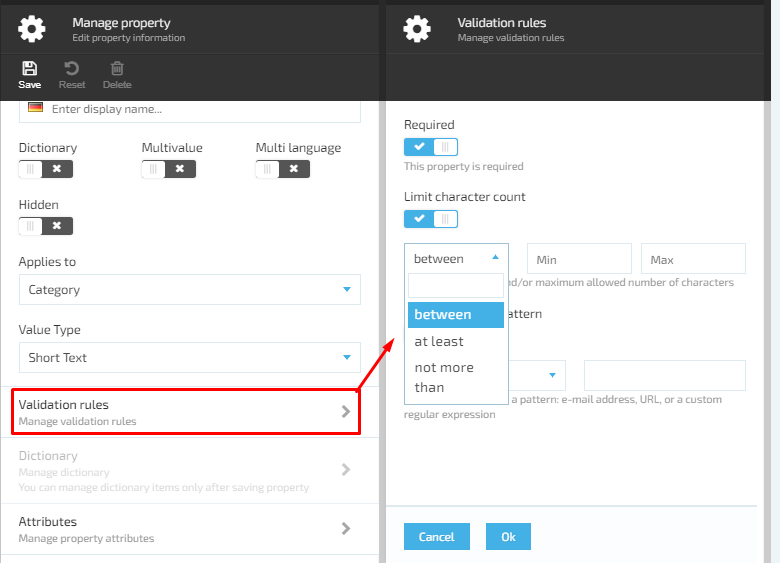
Select Validation rules on the Edit property information screen. This will take you to the Manage validation rules screen with the following items:
- Toggle buttons:
- Required
- Limit character count
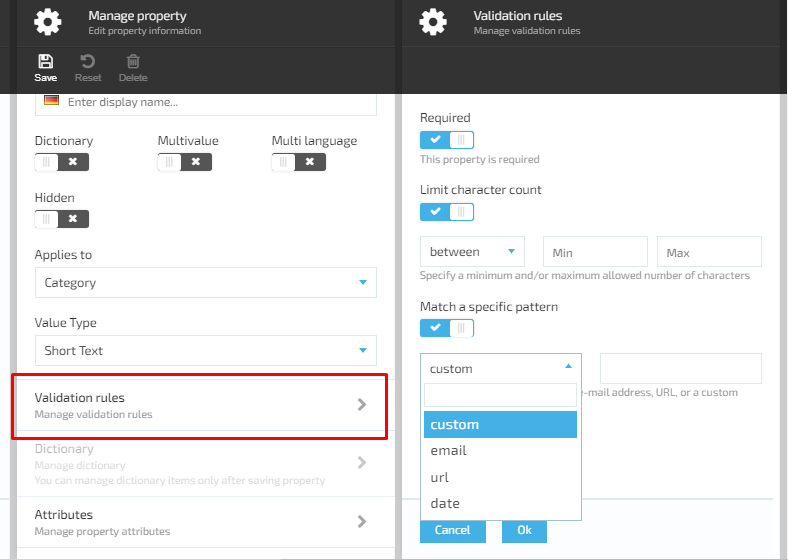
- Match a specific pattern
- Limit character count dropdown list (when active):
- Between: Specify the minimum and maximum allowed number of characters through the Min and Max fields
- At least: Specify the minimum char count within the Min field
- No more than: Specify the maximum char count within the Max field
- Match a specific pattern dropdown list (when active):
- Custom
- URL
- Date
- Toggle buttons:
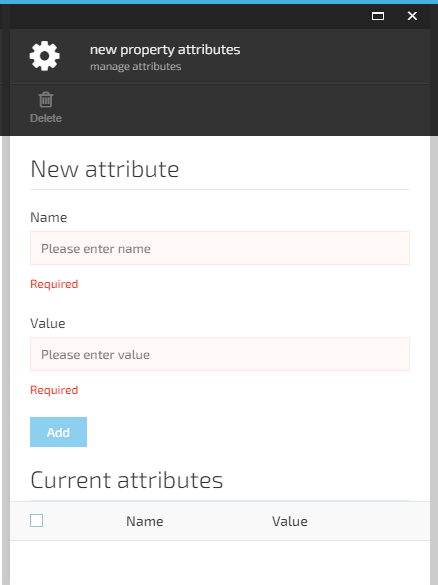
Managing Property Attributes
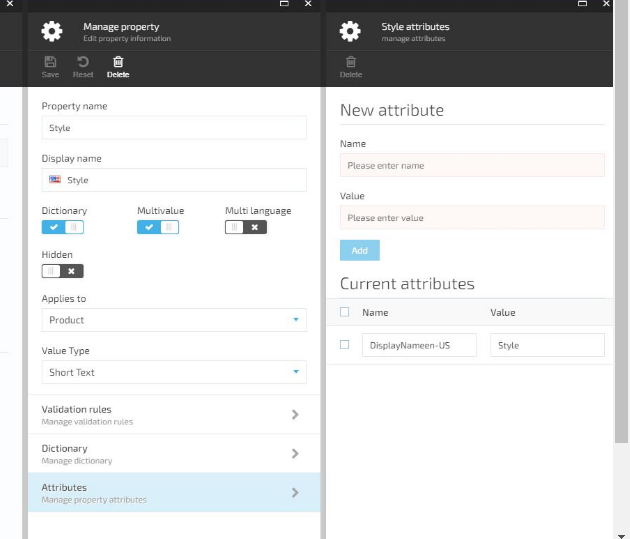
To manage property attributes, do the following: 1. On the Manage property screen, select Attributes to open the New property attributes screen. 1. Enter the new property name, specify the appropriate values, and click Add. This will add the new attribute to the property attribute list.
Managing SEO
To add a new SEO block, complete the following steps:
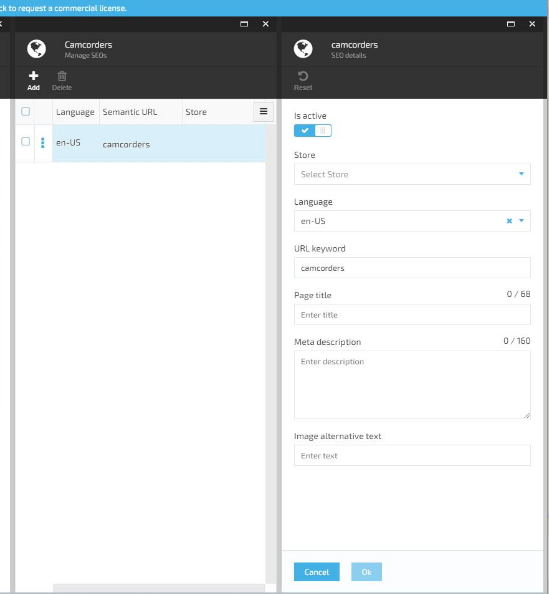
- Select the SEO widget on the Category details screen to open the Manage SEO screen with the following items:
- Active toggle button that allows you to activate or deactivate your SEO block
- Store dropdown list where you can pick the store this new SEO block will apply to
- Language dropdown list where you can pick the language for your new SEO block
- URL keyword textbox (required)
- Page title textbox
- Meta description textbox
- Image alternative text box
- Buttons:
- OK: Becomes active when you fill out all required fields
- Cancel: An always active button that allows you to go back without saving changes
- Fill out all required information and click OK. This will add your new SEO block to the SEO list.
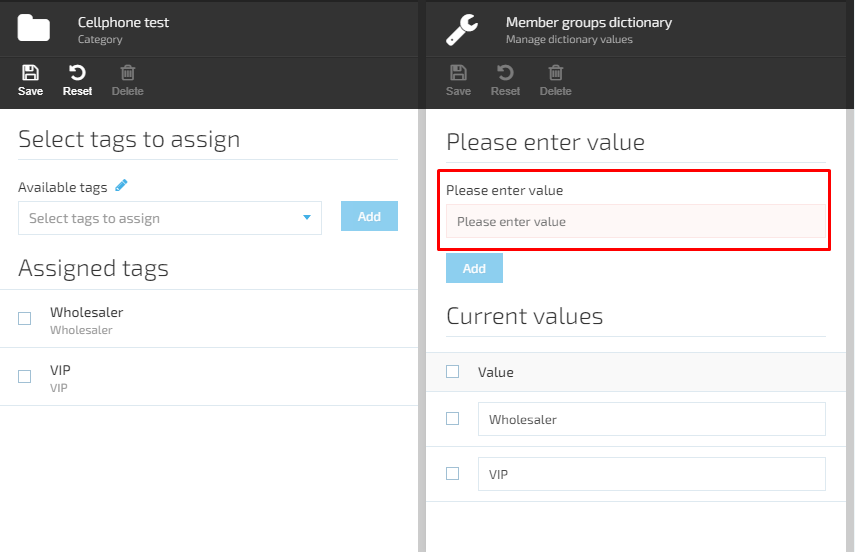
Assigning Tags
To assign tags to a certain category, do the following:
-
On the Category Details screen, select the Tags widget. In the next screen, assign tags based on the following items:
- Available tags dropdown list, which also allows you to add a new tag
- List of assigned tags
-
Select the tag from the dropdown list and click Add. The tag will appear in the Assigned tags list.
Adding New Tag
To add a new tag, do the following: 1. Click the Edit icon next to the Available tags label. 1. On the screen that will show up, enter the required value and click Add. Your new tag will be added to the tag list and displayed in the Available tags dropdown list.
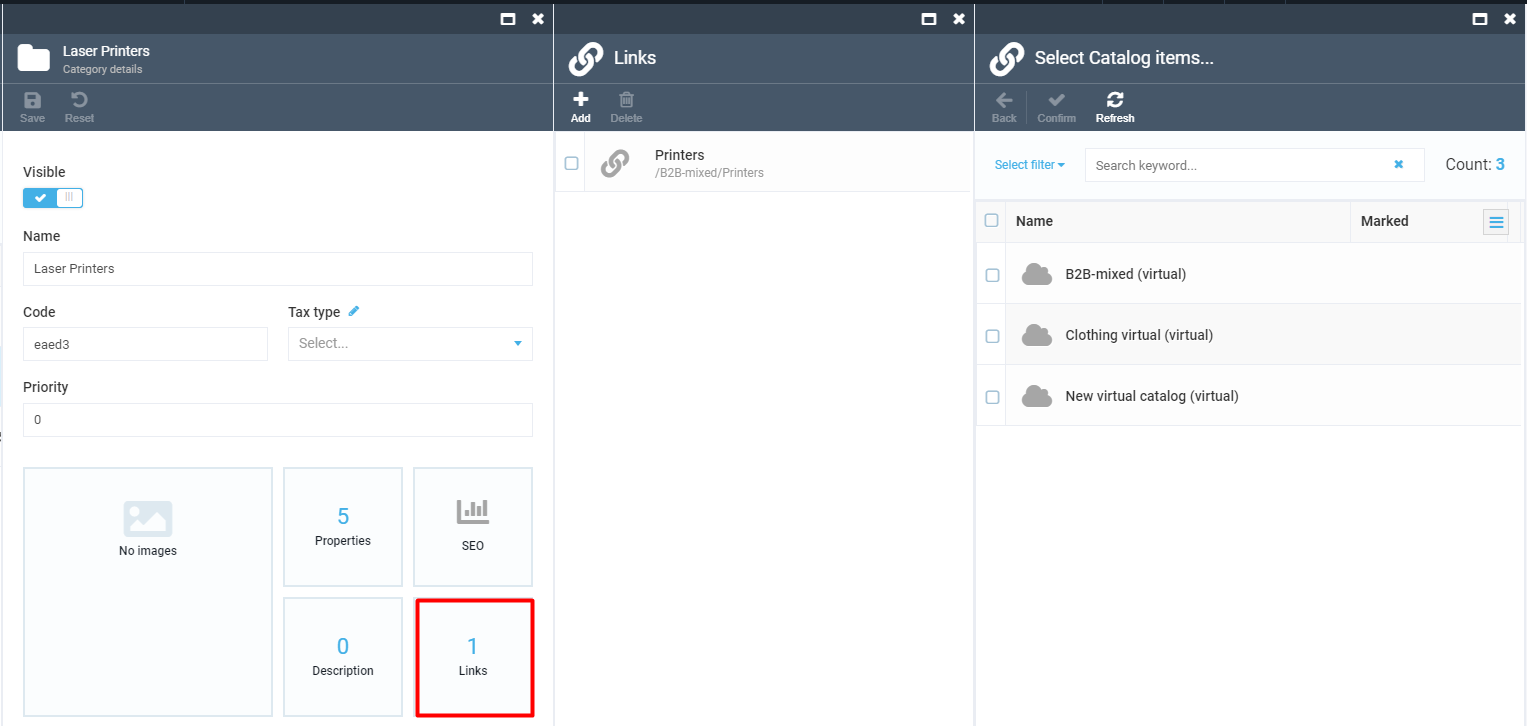
Links Widget
The Links widget allows you to link categories to virtual catalogs. This is how you can do it:
- Select the Links widget on the Category details screen. This will open the Links list blade, where you can create a new link to a virtual catalog or a category inside a virtual catalog.
- Click Add to open the Select catalog items screen, where you can:
- Select a catalog from a list of virtual catalogs
- Open a list of subdirectories after clicking a catalog record
- Select a category from the list
Note: You cannot select the current category (if it is in the list), categories labelled as Marked, or category links inside virtual catalogs.
- Pick the appropriate catalogs or categories from the list and click Confirm, which will create links to the current category within the selected virtual catalogs and categories.
- Pick the links from the list and click Delete if you want to remove the selected links.