Add New Assignment
Scenario
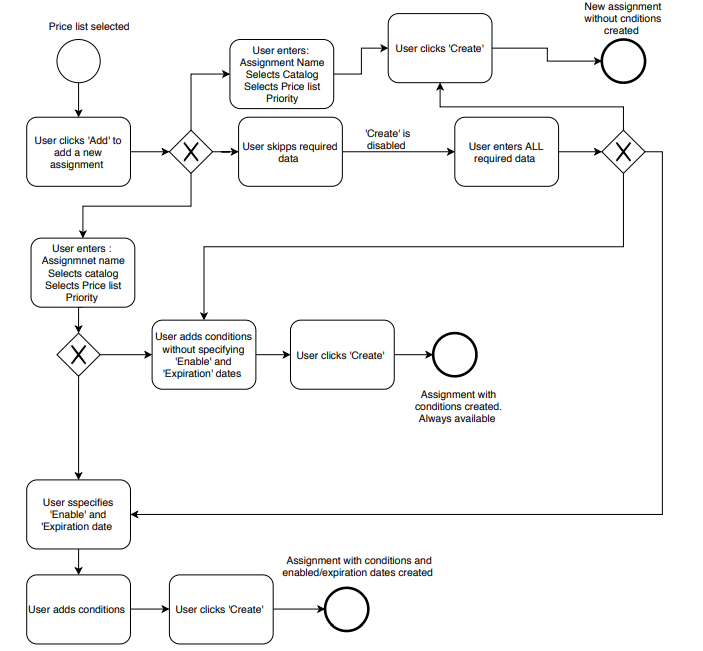
Simple Assignment without rules and conditions
- The user selects Price List on the Price Lists screen and clicks on the Assignments widget
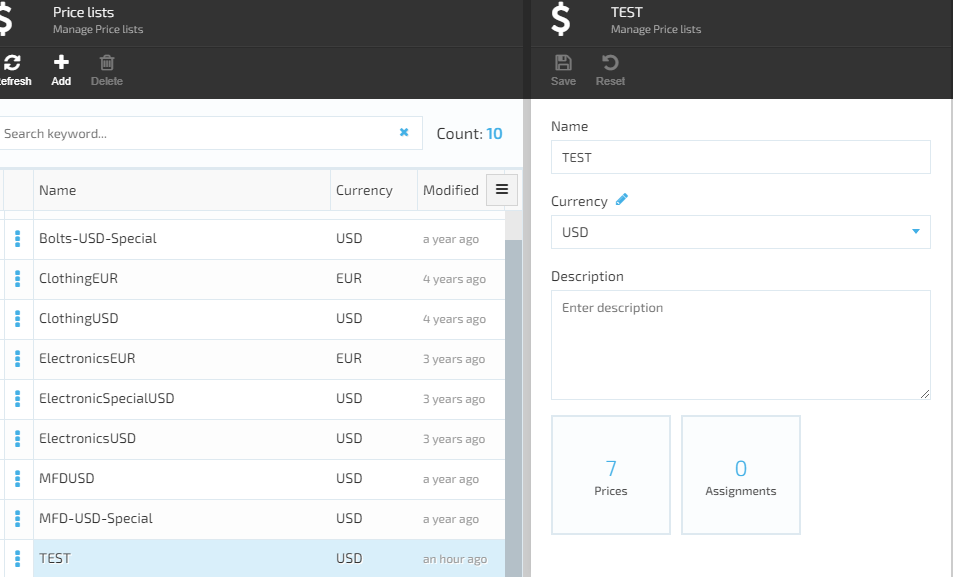
- The system opens a new screen with an active Add button that enables the user to add a new Assignment to the selected Price List
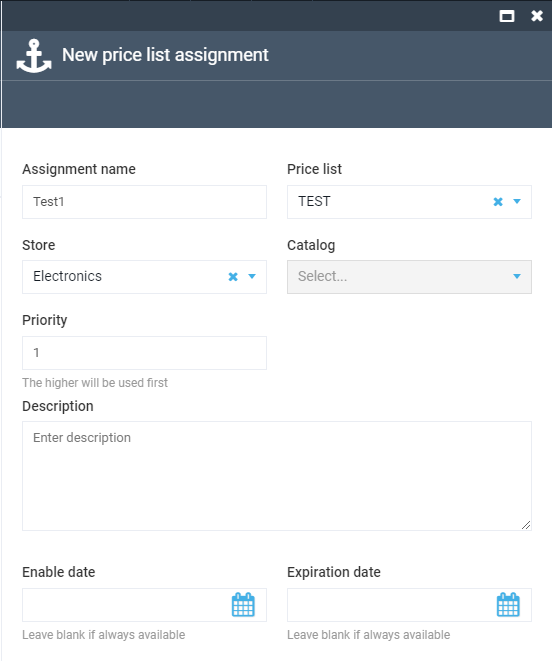
- The user clicks the Add button and the system opens the New Price List Assignment screen. The screen will display the following elements:
- Assignment Name input field - required
- Catalog drop down - disabled if Store is selected.
- Store drop down - disabled if Catalog is selected.
- Price List drop down- required
- Priority input field - required
- Description input field- optional
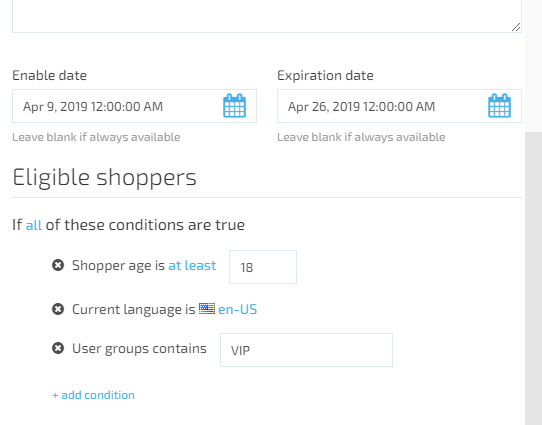
- Enable date – date picker optional
- Expiration date- date picker optional
- Under Eligible Shoppers:
- If any of these conditions are true:
- Any is a link
- Under Any selection is available: ALL, ANY
- Add condition button
- If any of these conditions are true:
- Create button becomes active only when required fields are filled out
- The user fills out the required data:
- Enters the Assignment Name
- Selects the Catalog or Store from the drop-down list. User can select either Catalog or Store to attach an assignment to.
- Selects the Price List from the drop-down list
- Specifies the Priority (1, 2, 3, etc.). The system will then display on the Storefront the Price List with the highest priority
- The user can also fill out the fill out the Description field, but it’s optional
- The user can optionally specify the date range using the date pickers from - to to determine Price List availability. If the user leaves the fields blank, that will mean the Price List is always available
- The system will create an assignment without additional rules and conditions
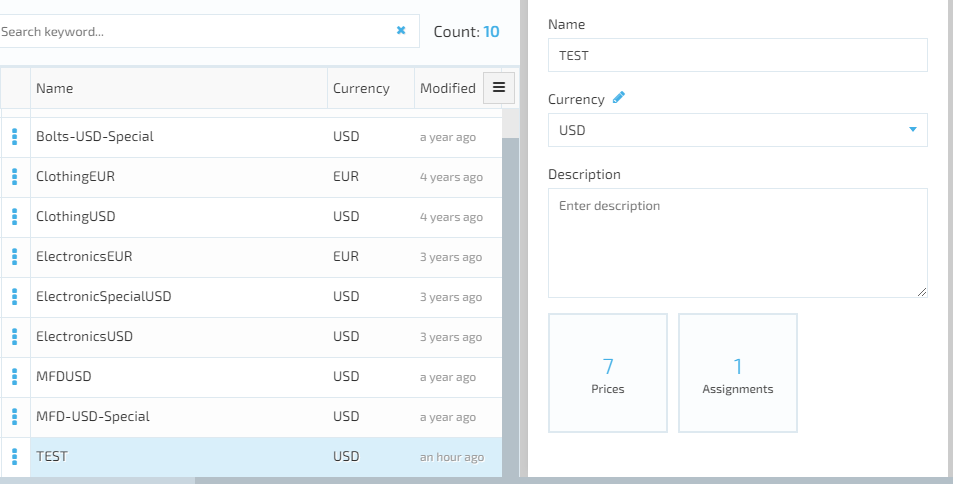
- The system will display the number of assignments created in the Assignment widget
Assignment with Rules and Conditions
- In the created Assignment under Eligible Shoppers the user should first select if Any or All conditions are true by clicking the Any link and selecting the option
- The system will display the selected option: Any or All
- The user clicks the Add condition icon
- The system will display the list of different conditions previously added to the system. Below is an example of different rules and conditions that can be assigned to the Price List
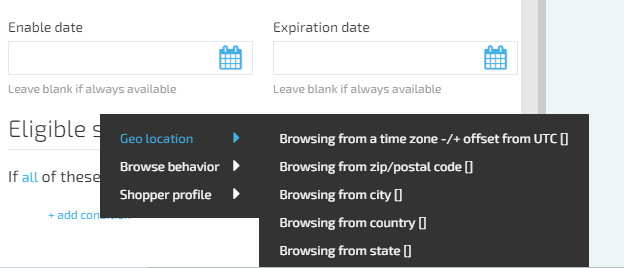
- The user selects as many conditions and needed from the list
- The system will display the selected conditions with possibility to delete them as shown on the screen shot bellow
- The user clicks the Save button on the top of the screen and the system will save the selected conditions
- The conditions will be assigned to the Price List
Last update:
February 1, 2024