Deploy on Windows
Use this guide to deploy and configure precompiled Virto Commerce Platform V3.
Prerequisites
- ASP.NET Core Runtime 8.0.0.
- Virto Commerce CLI, our proprietary command line interface that enables automating the installation process and updating the dependencies.
- MS SQL Server 2019 or higher.
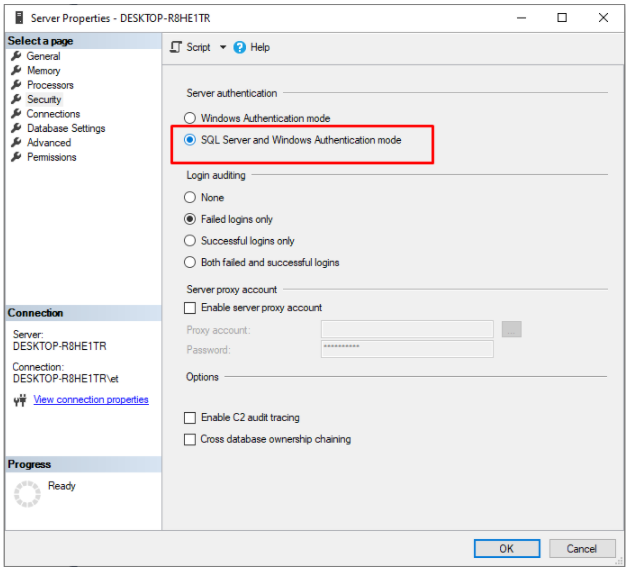
Note
After installing MS SQL server, switch its authentication to mixed mode, as described here.
- For VirtoCommerce 3.800 or higher, install MS Visual Studio 2022 (version 17.8 or higher).
- To edit the source code, install .NET 8 SDK.
-
For better search capabilities, install Elastic search 8.12.
Note
By default, VirtoCommerce uses Lucene .NET. However, it cannot be used in production due to its limited functionality.
Install Platform
The platform can be installed:
Download Precomplied Binaries
-
Open the Releases section of the Virto Commerce Platform in GitHub.
-
Find VirtoCommerce.Platform.3.x.x.zip file. This file contains the prebuilt site and can be executed without additional compilation. The source code is not included.
-
Unpack the downloaded file to the local directory /vc-platform-3 using the following command:
Now you have the directory with the precompiled files of the Virto Commerce Platform.
Use Virto Commerce CLI
To use Virto Commerce CLI (vc-build):
-
Install vc-build using the command:
-
Install the Platform and the modules using the command:
-
Specify the platform version (if required) using the command:
![]() Vc-build for packages management
Vc-build for packages management
Setup Platform
To set up the Platform:
Configure application strings
To configure application strings:
- Open the appsettings.json file in a text editor.
-
In the ConnectionStrings section, modify the VirtoCommerce node as follows:
    "ConnectionStrings": {
        "VirtoCommerce" : "Data Source={SQL Server URL};Initial Catalog={Database name};Persist Security Info=True;User ID={User name};Password={User password};MultipleActiveResultSets=True;Connect Timeout=30"
    },
Note
Make sure the user has permission to create new databases.
-
To display images, specify the public url for assets by updating
Assets:FileSystem:PublicUrlin the Assets section: -
To configure CMS content storage, specify the public url for content for content by updating
Content:FileSystem:PublicUrlin the Content section: -
Save the appsettings.json file to apply the configurations.
Run Platform
You can run the Platform:
- On HTTPS schema (Preferred).
- On HTTP schema.
-
Install and trust HTTPS certificate. Trust the .NET Core SDK HTTPS development certificate on Windows.
-
Run the Platform using the following command:
-
When the process is complete, you will see an output in the console similar to this:
Perform initial sign-in
To access the Platform and perform initial sign-in:
- Open your browser and type
https://localhost:5001. -
If you encounter the Your connection is not private error, click Advanced → Proceed to.... This option allows you to proceed to the website even though the browser has detected an issue with the SSL certificate.
Note
For additional details on addressing this error and using a self-signed certificate, refer to Trust the ASP.NET Core HTTPS development certificate.
-
Upon the first request, the application will create and initialize the database.
-
Once completed, you will be redirected to the sign-in page. Use the following credentials to sign in:
- Login:
admin - Password:
store
- Login:
-
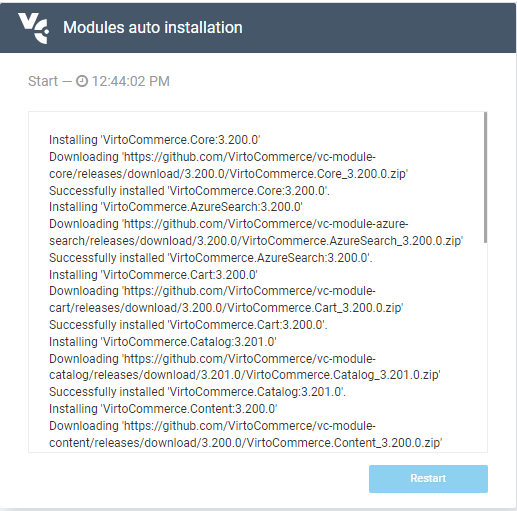
The installation wizard starts downloading default modules and sample data:
-
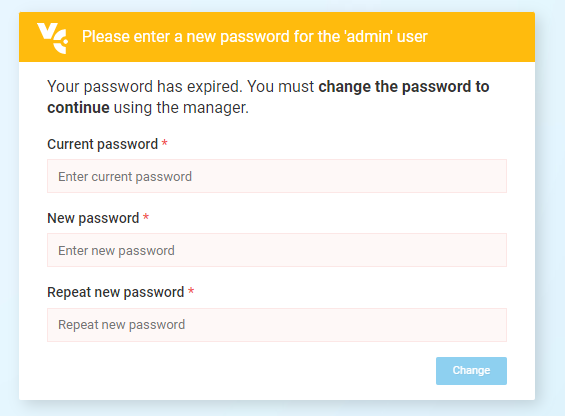
After installation, reset default credentials:
Your platform is ready to go.