Create New Module from Template
In this guide, we will learn how to create your own custom module according to your business or technical needs using the Virto Commerce ecosystem.
Create Solution from Template
To run your own Virto Commerce module, you can create it from scratch. However, it is recommended that you do it based on a predefined template. To do this:
- Create a source directory or, if you already have one, navigate to it.
- Open Windows CMD or PowerShell.
-
Run the following commands:
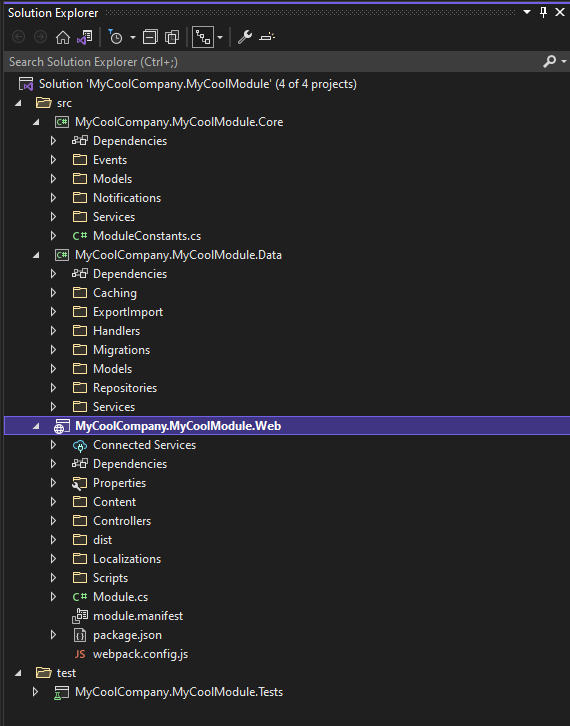
When you are done, you will have your vc-module-my-cool-module solution with the following structure, which you can see when you open your newly created module with Visual Studio:
Work with Database
Your next step is to connect your module to a database. Specifically, you need to define a model, entity, and repository classes that will constitute the persistent layer.
-
In the Core Project Models directory, add a file named
Blog.cswith the following code: -
In the Data Project Models directory, add another file named
BlogEntity.cswith the following code:using MyCoolCompany.MyCoolModule.Core.Models; using VirtoCommerce.Platform.Core.Common; using VirtoCommerce.Platform.Core.Domain; namespace MyCoolCompany.MyCoolModule.Data.Models; public class BlogEntity : AuditableEntity, IDataEntity<BlogEntity, Blog> { public string Name { get; set; } public Blog ToModel(Blog model) { model.Id = Id; model.Name = Name; return model; } public BlogEntity FromModel(Blog model, PrimaryKeyResolvingMap pkMap) { pkMap.AddPair(model, this); Id = model.Id; Name = model.Name; return this; } public void Patch(BlogEntity target) { target.Name = Name; } } -
In the Data Project Repositories directory, add a file named
BlogRepository.cswith the following code:using System.Collections.Generic; using System.Linq; using System.Threading.Tasks; using Microsoft.EntityFrameworkCore; using MyCoolCompany.MyCoolModule.Data.Models; using VirtoCommerce.Platform.Core.Domain; using VirtoCommerce.Platform.Data.Infrastructure; namespace MyCoolCompany.MyCoolModule.Data.Repositories; public class BlogRepository : DbContextRepositoryBase<MyCoolModuleDbContext> { public BlogRepository(MyCoolModuleDbContext dbContext, IUnitOfWork unitOfWork = null) : base(dbContext, unitOfWork) { } public IQueryable<BlogEntity> Blogs => DbContext.Set<BlogEntity>(); public virtual async Task<IList<BlogEntity>> GetBlogsByIdsAsync(IList<string> ids) { var result = await Blogs.Where(x => ids.Contains(x.Id)).ToListAsync(); return result; } } -
In the same Data Project Repositories directory, modify the
MyCoolModuleDbContext.csfile as follows:using EntityFrameworkCore.Triggers; using Microsoft.EntityFrameworkCore; using MyCoolCompany.MyCoolModule.Data.Models; namespace MyCoolCompany.MyCoolModule.Data.Repositories; public class MyCoolModuleDbContext : DbContextWithTriggers { public MyCoolModuleDbContext(DbContextOptions<MyCoolModuleDbContext> options) : base(options) { } protected MyCoolModuleDbContext(DbContextOptions options) : base(options) { } protected override void OnModelCreating(ModelBuilder modelBuilder) { modelBuilder.Entity<BlogEntity>().ToTable("Blogs").HasKey(x => x.Id); modelBuilder.Entity<BlogEntity>().Property(x => x.Id).HasMaxLength(128).ValueGeneratedOnAdd(); modelBuilder.Entity<BlogEntity>().Property(x => x.Name).HasMaxLength(128); } } -
Create the initial migration file in Visual Studio:
- Open Windows CMD or PowerShell in the Data Project directory (vc-module-my-cool-module\src\MyCoolCompany.MyCoolModule.Data)
-
Run the following commands:
This brings the InitialMigration.cs file to the Data Project Migrations directory.
Adding New API
To define services and an API layer to access the model:
-
In the Core Project Services directory, add the
IBlogService.csfile with the following code: -
In the Core Project Services directory, add another file named
IBlogSearchService.cswith the following code: -
In the Core Project Events directory, add the
BlogChangedEvent.csfile with the following code:using System.Collections.Generic; using MyCoolCompany.MyCoolModule.Core.Models; using VirtoCommerce.Platform.Core.Events; namespace MyCoolCompany.MyCoolModule.Core.Events; public class BlogChangedEvent : GenericChangedEntryEvent<Blog> { public BlogChangedEvent(IEnumerable<GenericChangedEntry<Blog>> changedEntries) : base(changedEntries) { } } -
In the Core Project Events directory, add another file named
BlogChangingEvent.cswith the following code:using System.Collections.Generic; using MyCoolCompany.MyCoolModule.Core.Models; using VirtoCommerce.Platform.Core.Events; namespace MyCoolCompany.MyCoolModule.Core.Events; public class BlogChangingEvent : GenericChangedEntryEvent<Blog> { public BlogChangingEvent(IEnumerable<GenericChangedEntry<Blog>> changedEntries) : base(changedEntries) { } } -
In the Core Project Models directory, add the
BlogSearchCriteria.csfile with the following code: -
In the Core Project Models directory, add another file named
BlogSearchResult.cs, with the following code: -
In the Data Project Services directory, add the
BlogService.csfile with the following code:using System; using System.Collections.Generic; using System.Threading.Tasks; using MyCoolCompany.MyCoolModule.Core.Events; using MyCoolCompany.MyCoolModule.Core.Models; using MyCoolCompany.MyCoolModule.Core.Services; using MyCoolCompany.MyCoolModule.Data.Models; using MyCoolCompany.MyCoolModule.Data.Repositories; using VirtoCommerce.Platform.Core.Caching; using VirtoCommerce.Platform.Core.Common; using VirtoCommerce.Platform.Core.Events; using VirtoCommerce.Platform.Data.GenericCrud; namespace MyCoolCompany.MyCoolModule.Data.Services; public class BlogService : CrudService<Blog, BlogEntity, BlogChangingEvent, BlogChangedEvent>, IBlogService { public BlogService( Func<BlogRepository> repositoryFactory, IPlatformMemoryCache platformMemoryCache, IEventPublisher eventPublisher) : base(repositoryFactory, platformMemoryCache, eventPublisher) { } protected override Task<IList<BlogEntity>> LoadEntities(IRepository repository, IList<string> ids, string responseGroup) { return ((BlogRepository)repository).GetBlogsByIdsAsync(ids); } } -
In the Data Project Services directory, add another file named
BlogSearchService.cswith the following code:using System; using System.Collections.Generic; using System.Linq; using Microsoft.Extensions.Options; using MyCoolCompany.MyCoolModule.Core.Models; using MyCoolCompany.MyCoolModule.Core.Services; using MyCoolCompany.MyCoolModule.Data.Models; using MyCoolCompany.MyCoolModule.Data.Repositories; using VirtoCommerce.Platform.Core.Caching; using VirtoCommerce.Platform.Core.Common; using VirtoCommerce.Platform.Core.GenericCrud; using VirtoCommerce.Platform.Data.GenericCrud; namespace MyCoolCompany.MyCoolModule.Data.Services; public class BlogSearchService : SearchService<BlogSearchCriteria, BlogSearchResult, Blog, BlogEntity>, IBlogSearchService { public BlogSearchService( Func<BlogRepository> repositoryFactory, IPlatformMemoryCache platformMemoryCache, IBlogService crudService, IOptions<CrudOptions> crudOptions) : base(repositoryFactory, platformMemoryCache, crudService, crudOptions) { } protected override IQueryable<BlogEntity> BuildQuery(IRepository repository, BlogSearchCriteria criteria) { var query = ((BlogRepository)repository).Blogs; return query; } protected override IList<SortInfo> BuildSortExpression(BlogSearchCriteria criteria) { var sortInfos = criteria.SortInfos; if (sortInfos.IsNullOrEmpty()) { sortInfos = [ new SortInfo { SortColumn = nameof(BlogEntity.Id) }, ]; } return sortInfos; } } -
In the Web project Controllers/Api directory, change
MyCoolModuleController.csas follows:using System.Threading.Tasks; using Microsoft.AspNetCore.Mvc; using MyCoolCompany.MyCoolModule.Core.Models; using MyCoolCompany.MyCoolModule.Core.Services; namespace MyCoolCompany.MyCoolModule.Web.Controllers.Api { [Route("api/my-cool-module")] public class MyCoolModuleController : Controller { private readonly IBlogService _blogService; private readonly IBlogSearchService _blogSearchService; public MyCoolModuleController( IBlogService blogService, IBlogSearchService blogSearchService) { _blogService = blogService; _blogSearchService = blogSearchService; } [HttpPost] [Route("")] public async Task<ActionResult<Blog>> AddBlog(string name) { var blog = new Blog { Name = name }; await _blogService.SaveChangesAsync([blog]); return Ok(blog); } [HttpGet] [Route("")] public async Task<ActionResult<BlogSearchResult>> GetAll() { var result = await _blogSearchService.SearchAsync(new BlogSearchCriteria()); return Ok(result); } } } -
Register all created services by changing the Initialize method in
Module.csas follows:public void Initialize(IServiceCollection serviceCollection) { // Initialize database var connectionString = Configuration.GetConnectionString(ModuleInfo.Id) ?? Configuration.GetConnectionString("VirtoCommerce"); serviceCollection.AddDbContext<MyCoolModuleDbContext>(options => options.UseSqlServer(connectionString)); serviceCollection.AddTransient<BlogRepository>(); serviceCollection.AddTransient<Func<BlogRepository>>(provider => () => provider.CreateScope().ServiceProvider.GetRequiredService<BlogRepository>()); serviceCollection.AddTransient<IBlogService, BlogService>(); serviceCollection.AddTransient<IBlogSearchService, BlogSearchService>(); }
Test and Debug API
After creating your module, install it from your source and debug it as follows:
-
Link the Module Web directory to the Platform/modules directory:
mklink /d C:\source\vc-platform\src\VirtoCommerce.Platform.Web\modules\my-cool-module\ C:\source\vc-module-my-cool-module\src\MyCoolCompany.MyCoolModule.WebNote
In the above example,
c:\source\is a path to the directory with your code. -
Restart the platform.
-
Open Swagger API at http://localhost:10645/docs/index.html, find
MyCoolModule extension module, and run the POST method to verify that everything is working properly: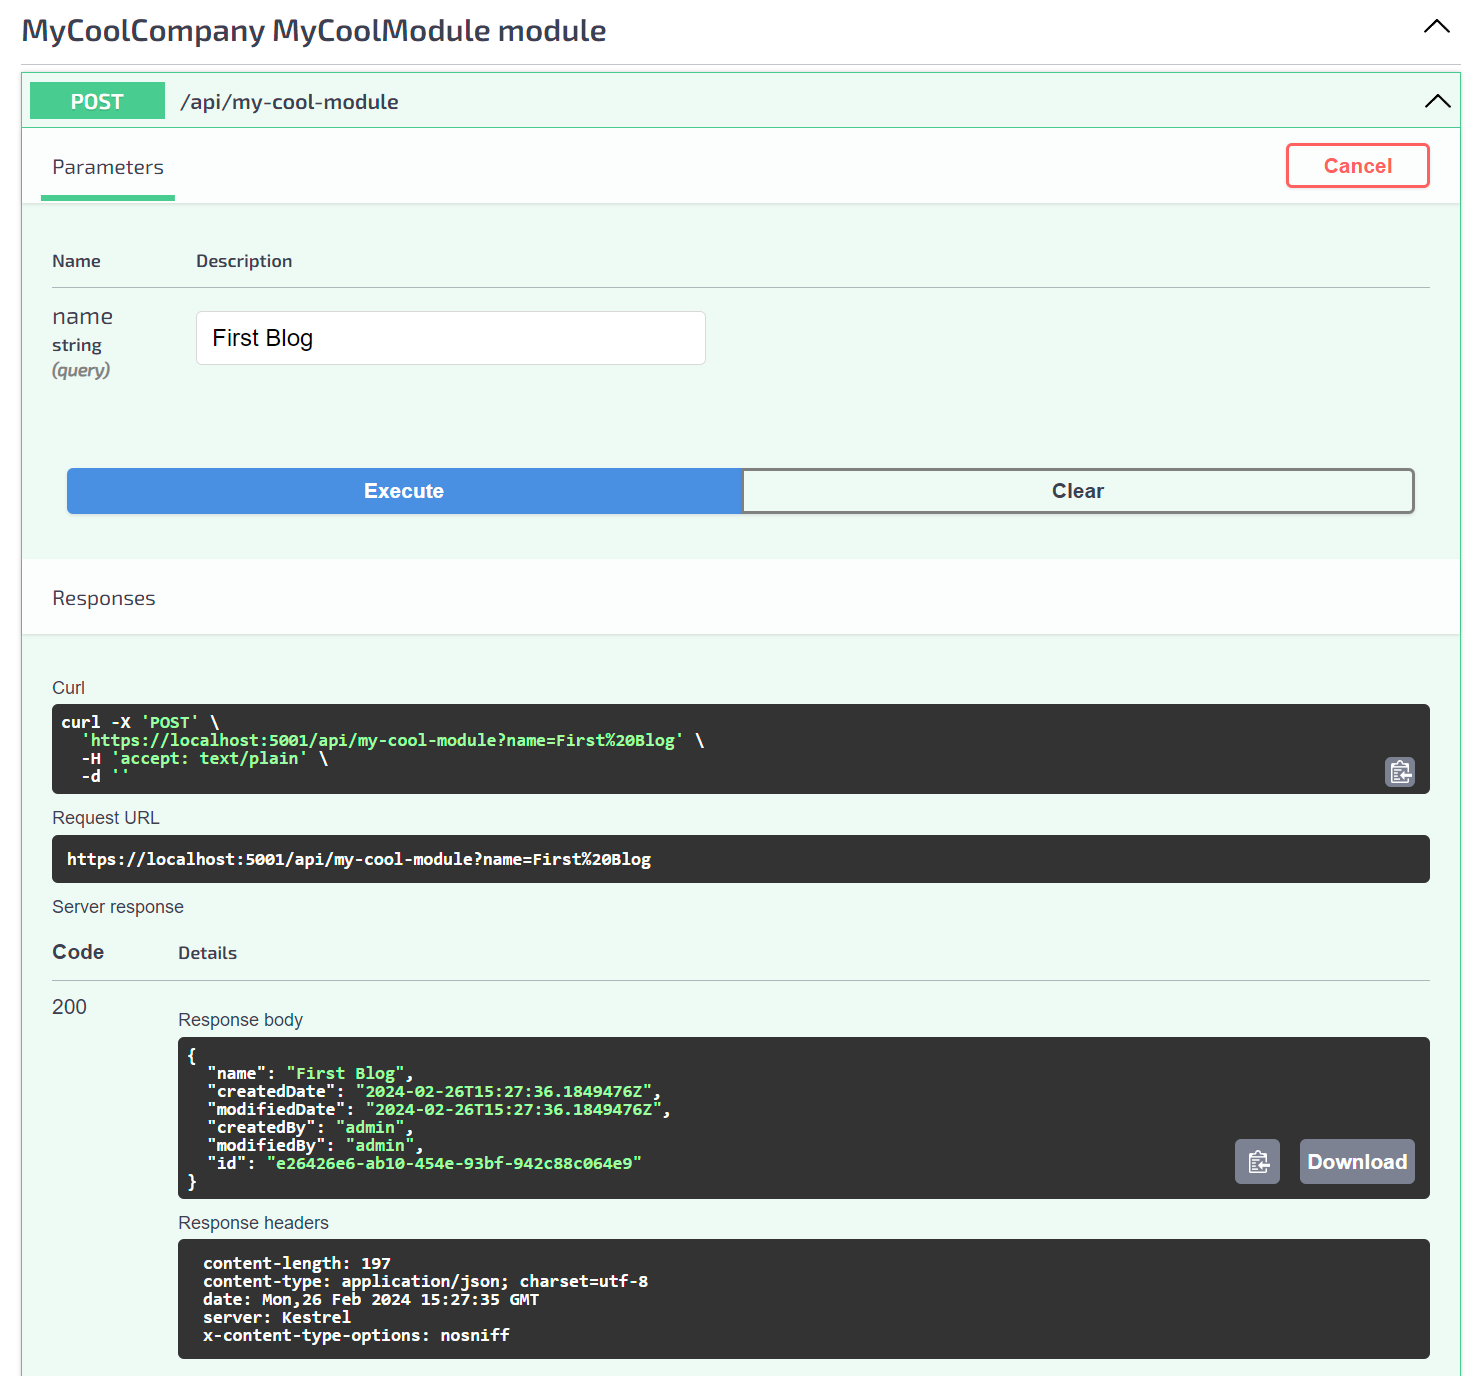
This creates a new blog record.
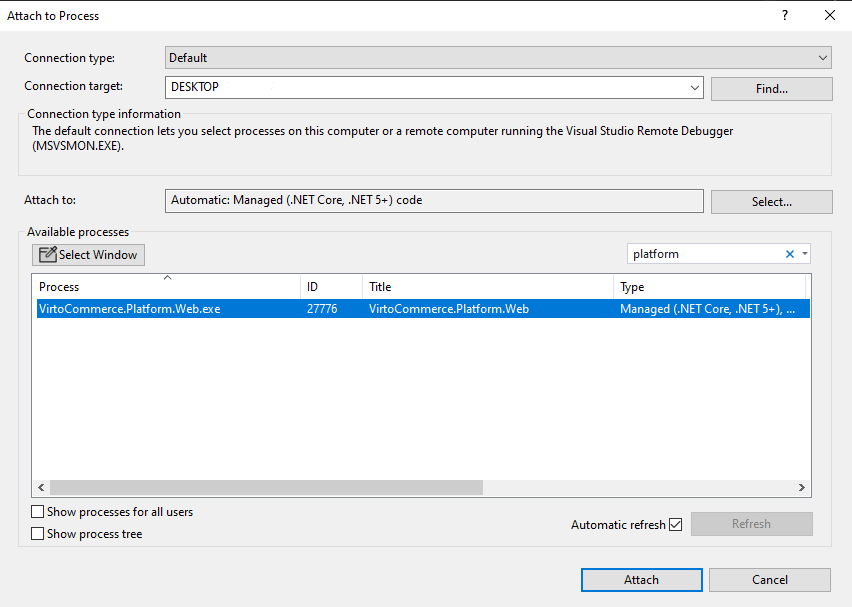
-
To debug your module, attach the platform process to the Visual Studio module solution by navigating to Tools → Attach to Process → [Find the platform process] → Attach:
Extend VC Manager with New UI
Our module template provides scripts to help you extend the Platform Manager UI. You can find these scripts in the Web Scripts directory:
module.jscontains the UI module registration code.resources/my-cool-module-api.jscontains the Web API service.blades/hello-world.jscontains the basic blade template.
To extend the Platform Manager UI:
-
Modify blades/hello-world.js as follows:
angular.module('MyCoolModule') .controller('MyCoolModule.helloWorldController', ['$scope', 'MyCoolModule.webApi', function ($scope, api) { var blade = $scope.blade; blade.title = 'MyCoolModule'; blade.refresh = function () { api.get(function (data) { blade.title = 'MyCoolModule.blades.hello-world.title'; blade.data = data.results; blade.isLoading = false; }); }; blade.refresh(); }]); -
Modify blades/hello-world.html as follows:
<div class="blade-content"> <div class="blade-inner"> <div class="inner-block"> <div class="table-wrapper"> <table class="table __normal"> <tbody ng-model="blade.data"> <tr class="table-item" ng-repeat="data in blade.data track by data.name"> <td class="table-col"> <div class="table-t"> {{ data.name }} </div> </td> </tr> </tbody> </table> </div> </div> </div> </div> -
Build script artifacts:
- Navigate to the module Web project directory.
-
Open Windows CMD or PowerShell and run the following commands:
-
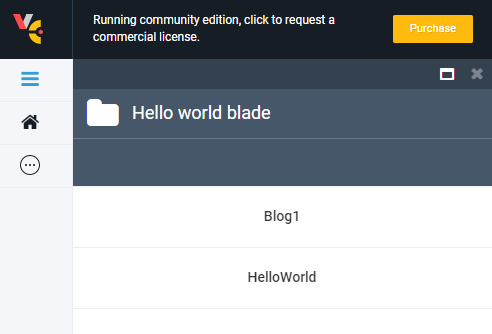
Verify that the platform UI has been extended with your module scripts:
- Open the platform UI.
- Go to the
MyCoolModulemenu. You will see all created Blogs records.
Add Authentication Options
Our module template also provides you with out-of-the-box default authentication permissions, which are located in the ModuleConstants.cs file:
    public static class Permissions
    {
        public const string Access = "MyCoolModule:access";
        public const string Create = "MyCoolModule:create";
        public const string Read = "MyCoolModule:read";
        public const string Update = "MyCoolModule:update";
        public const string Delete = "MyCoolModule:delete";
    }
You can find the registration code inside the Module.cs PostInitialize method:
// Register permissions
var permissionsRegistrar = serviceProvider.GetRequiredService<IPermissionsRegistrar>();
permissionsRegistrar.RegisterPermissions(ModuleInfo.Id, "MyCoolModule", ModuleConstants.Security.Permissions.AllPermissions);
To restrict access to an endpoint with a permission, add the Authorize attribute to it:
    [HttpGet]
    [Route("")]
    [Authorize(ModuleConstants.Security.Permissions.Read)]
    public async Task<ActionResult<BlogSearchResult>> GetAll()
Pack Your Module
To build your custom module for distribution, use our Virto Commerce CLI tool:
- Navigate to the module root directory.
- Open Windows CMD or PowerShell.
-
Run the following commands:
The result will be as follows:
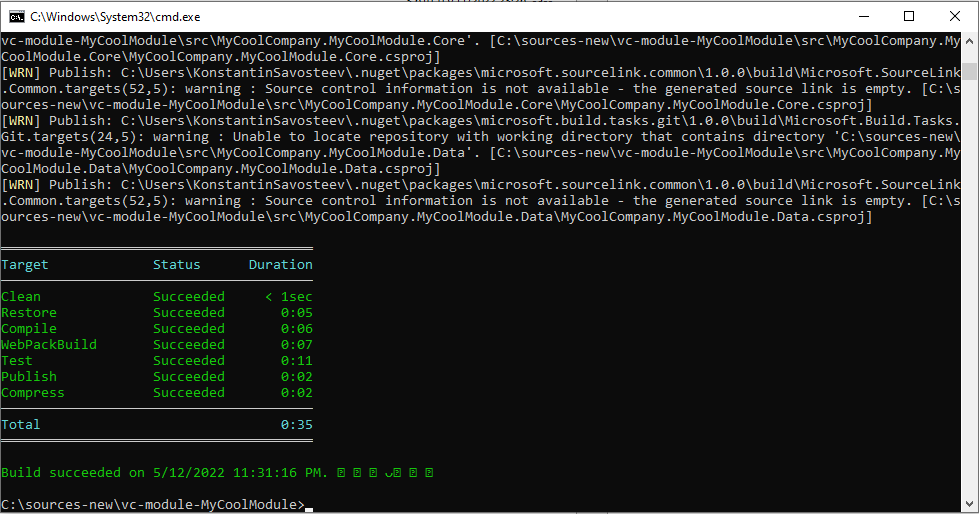
Note
The new module package will be created in the Artifacts directory.
Distribution and Installation
The module package can be uploaded and installed to the Virto Commerce Platform. To do this:
- Open the Virto Commerce Admin Portal and sign into it.
- Select the
Modulesmenu and navigate to theAdvancedsection. - Install or update the module from a file.
- Restart the platform.
If the module is installed properly, you will see the new module in the list of the installed modules, in the Admin UI, and in the Swagger API: