GraphQL API call from Postman
Many developers use both Postman and Playground to work with GraphQL based on the specific tasks they need to accomplish. Postman provides a wide range of tools for creating, sending, and tracking requests to APIs. Postman allows you to create collections of requests, automate API testing, set up environments, work with variables, create scripts for more complex tests. This guide explains how to make GraphQL API calls using Postman.
Our instruction contains fundamental guidelines. For more information, refer to the extensive Postman guide.
To explore GraphQL via Postman:
- Import GraphQL schemas from Playground.
- Generate collections.
- Create environments.
- Use tokens.
- Build queries and mutations.
- Use variables.
Import GraphQL schemas from Playground
Importing schemas is the crucial initial step to begin working with Postman for GraphQL. To import schemas:
- Open Playground. Inside Playground, locate and click the Schema tab.
- Copy all the content within the Schema tab to your clipboard.
- Open Postman, either using the desktop application or the web version.
- In Postman, go to the APIs tab in the sidebar. Click Create an API or
 to add a new API. If necessary, rename your API.
 - In the API setup, look for the Definition segment and click .
- From the dropdown list that appears, select Author from scratch.
- In the subsequent dropdown lists, set GraphQL as the Definition type and GraphQL SDL as the Definition format.
- Click Create definition.
-
Paste the content you copied from Playground into the main field and click Save.
Note
Postman cannot update your schema automatically. You have to update it manually on a regular basis.
Generate collection
Collections are sets of requests grouped together for organized and streamlined testing and documentation. To generate a collection:
- Open Postman and navigate to your newly created API.
- Look for the Collections segment and click . This will open a dropdown list.
- From the dropdown list, select Add new collection.
- Name your collection in the provided field.
- Click Generate Collection.
The list of available queries and mutations appeares in the menu.
Create environment
Environments are predefined sets of variables that allow you to configure and switch between different testing and development environments easily. To create an environment:
- Click on the Environments tab in the sidebar.
- Click to create a new environment.
- Enter its name.
- Copy address from Playground and paste it as initial value.
- In the APIs tab, select your newly created environment from the dropdown list.
Example
This example illustrates how query responses can be adapted to meet specific requirements using variables.
Show total products amount in B2B-store with their:
- Ids.
- Names.
- Images urls.
- Images ids.
- Descriptions.
query products ($after: String, $first: Int, $storeId: String!, $userId: String, $currencyCode: String, $cultureName: String, $query: String, $filter: String, $fuzzy: Boolean, $fuzzyLevel: Int, $facet: String,
    $sort: String, $productIds: [String]) {
    products (after: $after, first: $first, storeId: $storeId, userId: $userId, currencyCode: $currencyCode, cultureName: $cultureName, query: $query, filter: $filter, fuzzy: $fuzzy, fuzzyLevel: $fuzzyLevel,
        facet: $facet, sort: $sort, productIds: $productIds) {
        totalCount
        items
        {
            id
            name
            images
            {
                url
                id
            }
            descriptions
            {
                languageCode
                content
            }
        }
    }
}
Show first 10 required products in B2B-store.
Show first two Epson products in B2B-Store.
Authorization and token usage
In Postman, there are generally two common ways to use tokens, which can be used for authentication in API requests:
Generate token
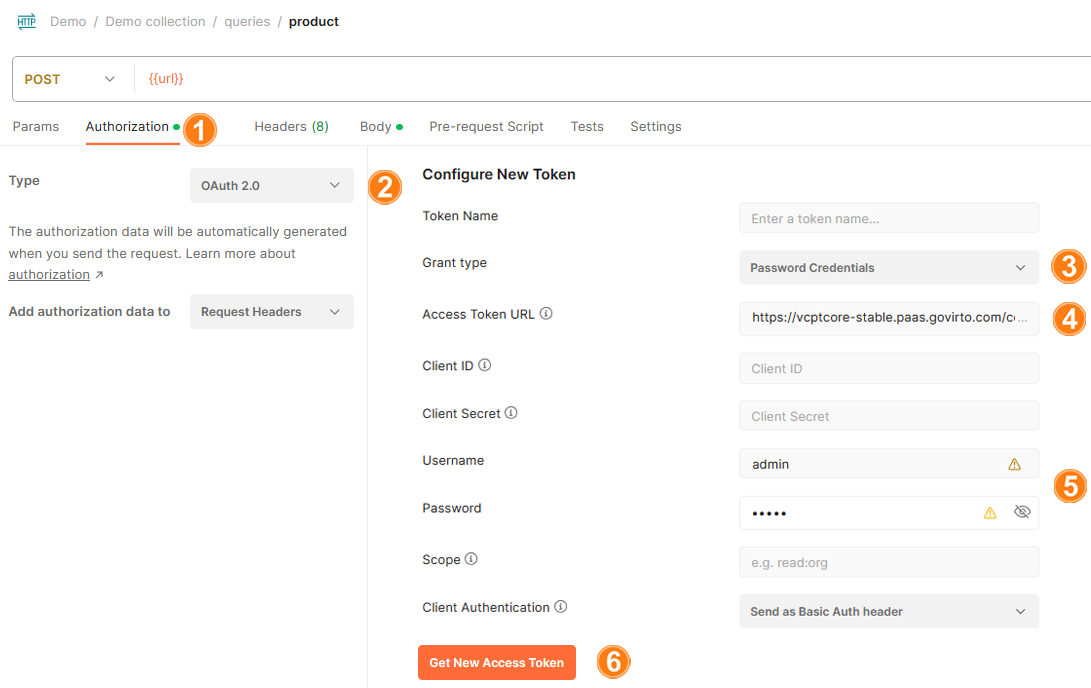
To generate token via OAuth 2.0 Postman functionality:
- Open the Authorization tab.
- From a dropdown list, select OAuth 2.0 type.
- Set Password Credentials as Grant Type to allow exchanging username and password for an access token directly.
-
Enter Access token URL. It can be taken:
- From Swagger.
- From Platform backend.
-
Enter username and password.
-
Click Get new access token.
-
The token appears in the new window. Click Use token to start using it.
Now all the queries and mutations can use this token.
Note
In the Authorization tab, check that the variables are inherited from parent.
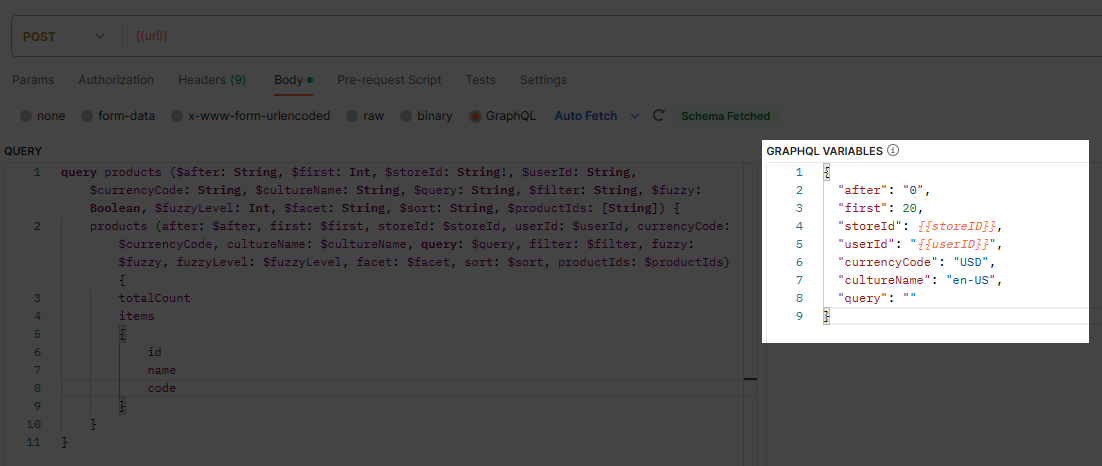
Build queries and mutations
You can use Postman to build queries and mutations:
- In the top toolbar, click New to create a new request.
- Select GraphQL in the next window.
- Click Use a GraphQL API in the query tab. Then select your API from the dropdown list.
- Enter {{url}} in the URL bar.
-
Now you can build queries and mutations in the Query tab.
Example query
Let's build a query asking for the total number of products and categories from the "B2B-store" that contain the word "bolt" in their names or descriptions.
- Check Products and Categories queries in the list of queries and mutations.
- Fill in the required fields that are checked automatically (i.e. B2B-Store).
- Add query field to narrow the results. Fill it in with bolt.
- Click Query.
There are 93 products and 32 categories in B2B-store that contain the term "bolt" in their names or descriptions.
Example mutation
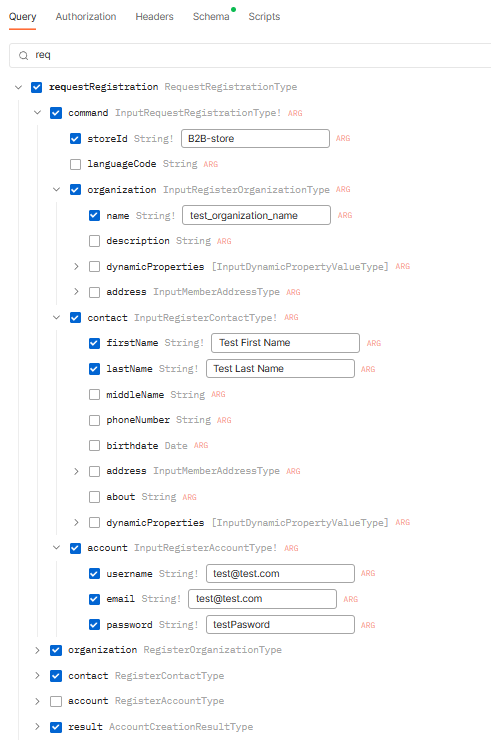
Let's build a requestRegistration mutation to register test_organization_name company and its user named Test First Name Test Last Name.
-
Click requestRegistration and fill in the following fields:
-
The resulting query looks as follows:
mutation RequestRegistration { requestRegistration( command: { organization: { name: "test_organization_name" } contact: { firstName: "Test First Name", lastName: "Test Last Name" } account: { username: "[email protected]" email: "[email protected]" password: "testPasword" } storeId: "B2B-store" } ) { organization { id name description status createdBy ownerId } contact { id firstName lastName middleName phoneNumber birthdate status createdBy about address { id key isDefault city countryCode countryName email firstName middleName lastName line1 line2 name organization phone postalCode regionId regionName zip outerId description addressType } } result { succeeded requireEmailVerification errors { code description parameter } } } } -
Click Query to execute the mutation.
- To check the result, open Platform and click Contacts in the main menu.
- The Test organization name company has been succesfully created with the user Test first name Test last name.
Preset variables
In Postman, you can preset frequently used variables to streamline the process of sending requests and testing APIs:
- Click Environments in the sidebar to select the required environment.
-
Add frequently used variables and their values.
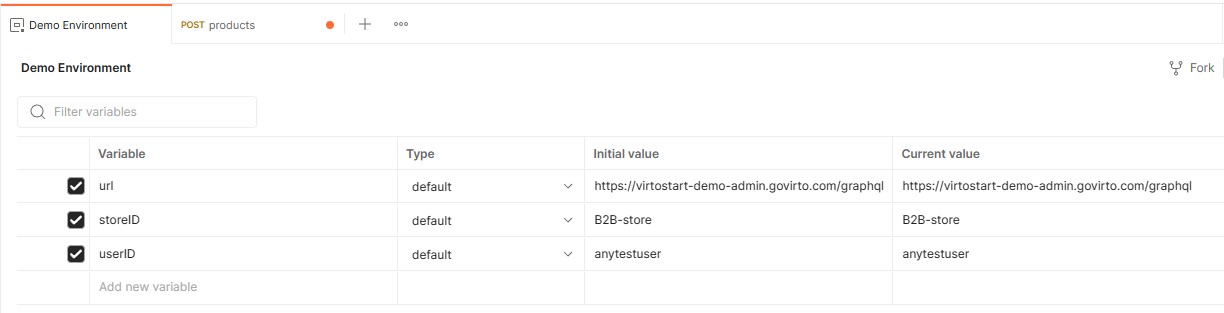
-
Click Save to save the changes.
Now you do not need to enter the values for each query and mutation. Enter preset variables in double curly brackets, e.g. {{StoreID}}.
Info
Some variables can be obtained from other queries. For example, you can retrieve the user ID by executing the createUser mutation, and to obtain the cart ID, you can use the cart query.
Preset token as variable
You can set variables programmatically in your request scripts. For more information, refer to the extensive Postman guide. To set your access token as a variable:
-
Execute the following query and provide a variable (e.g.,
AdminToken) to save the response value to in the Tests tab.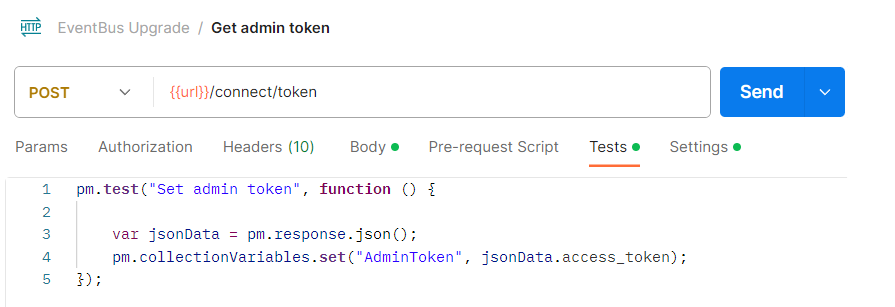
-
In the Authorization tab, set the Token field as {{AdminToken}}.
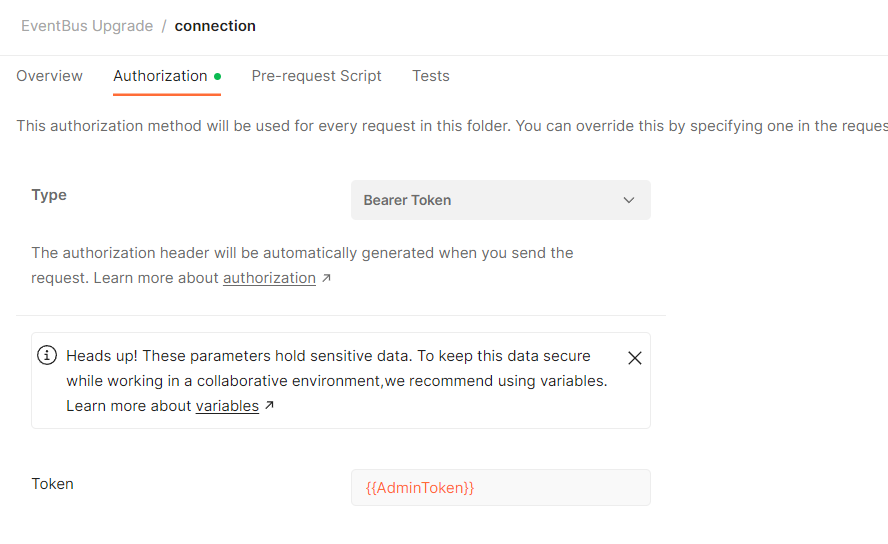
Now you can use your token as a variable.