Manage Contacts
Managing contact entities (companies, employees, customers, and vendors) includes:
- Adding contacts.
- Editing contacts.
- Deleting contacts.
- Exporting contacts.
- Importing contacts.
- Updating contacts.
Add Contacts
To add a contact:
- Click Contacts in the main menu.
- In the next blade, click Add in the toolbar to open the New Contact blade.
-
Select the entity you need and start creating your contact. We will use Organization as an example. Adding employees, contacts, and vendors is a similar process.
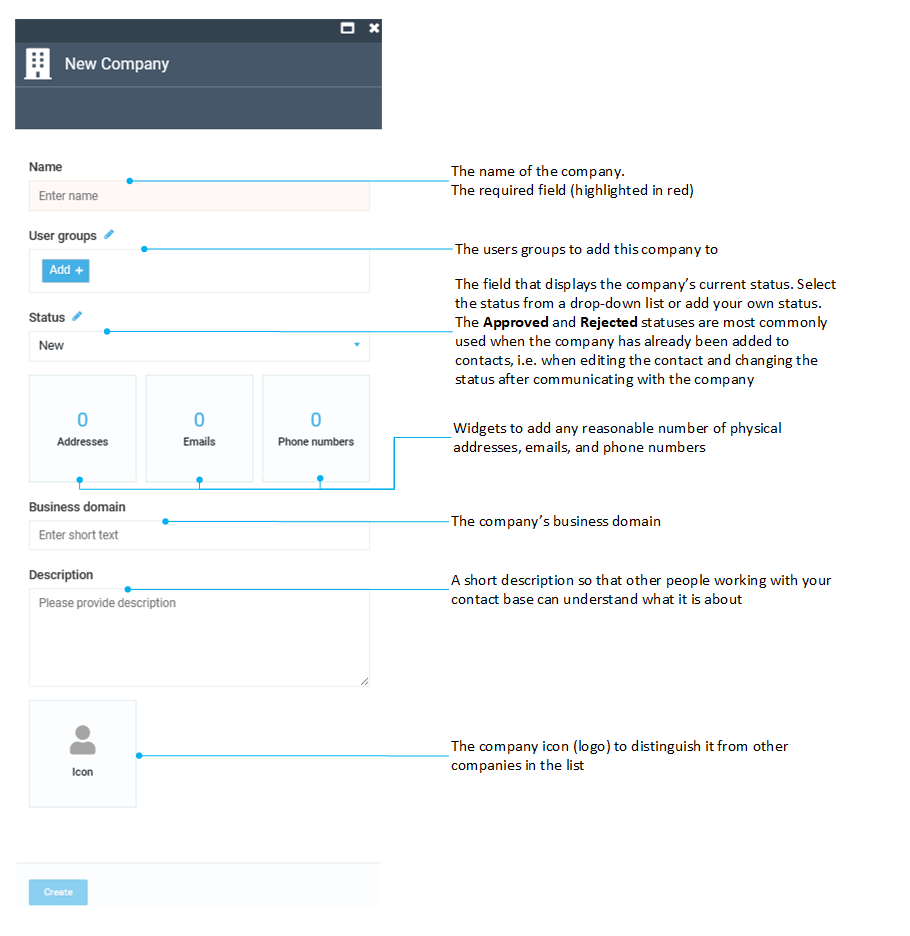
Assigning organizations or users to particular user groups enables showing personal offers to them.
-
Click Create to save the changes.
The company appears in the Companies and Contacts list.
Edit Contacts
To edit any previously added contact:
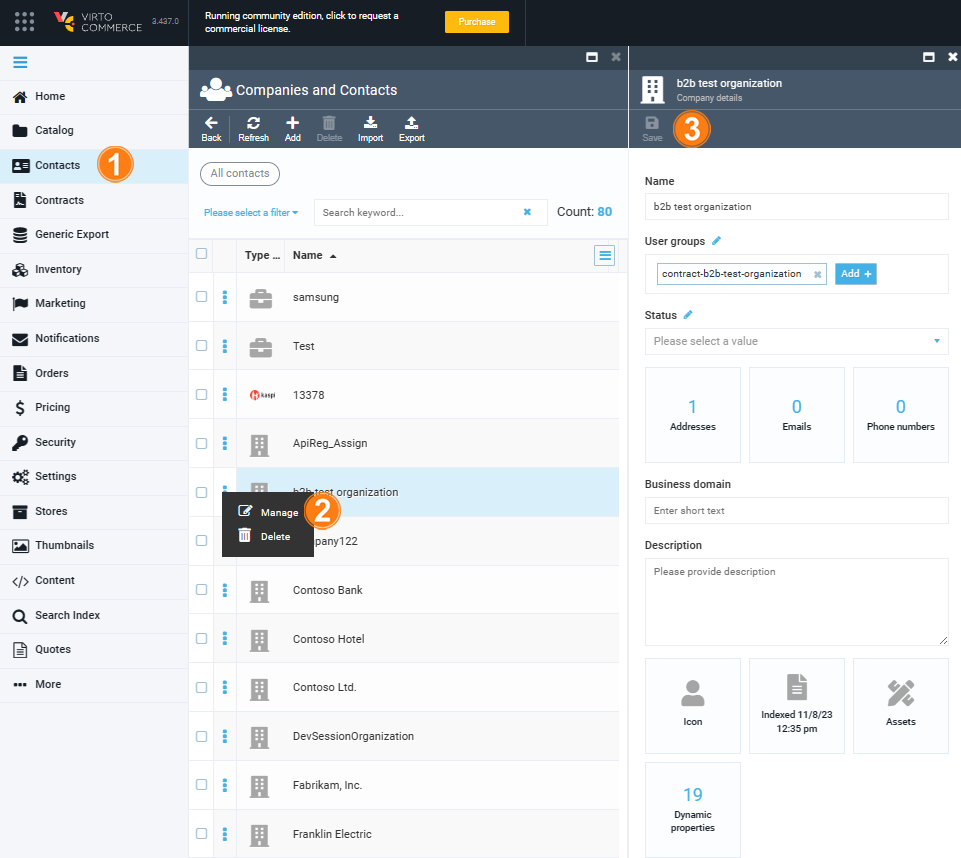
- Click Contacts in the main menu.
- In the Companies and Contacts blade, click the three dots to the left of the required contact's name and click Manage in the popup menu.
- In the next blade, update the contact and click Save in the toolbar to save the changes.
Note
Editing the Company details blade allows you to upload and assign assets (images, documents, etc.) to this company. Use the Assets widget that appears when editing the company details.
The contact has been edited.
Delete Contacts
To delete a contact:
- Click Contacts in the main menu.
- In the Companies and Contacts blade, check the contact you need to delete.
- Click Delete in the toolbar.
- Confirm your action.
The contact has been deleted.
Export Contacts
Note
Exporting contacts requires the preinstalled Customer Export and Import module.
To export contacts into a CSV file:
- Click Contacts in the main menu.
-
In the next Companies and Contacts blade, check the required contact (vendor/ organization/ person).
Note
If you do not check any contact, all the contacts of all the organizations will be exported into a CSV file.
-
Click Export in the top toolbar and confirm your action.
- In the next blade, click on the generated links to download the contacts:

The contacts have been saved as a CSV file.
Import Contacts
Note
Importing contacts requires the preinstalled Customer Export and Import module.
To import contacts into the Contacts module:
- Prepare a CSV file of contacts. We recommend to export a sample CSV file and use it as a template.
- Click Contacts in the main menu.
-
In the next Companies and Contacts blade, click Import in the top toolbar.
Tip
In this step, you can specify an organization to import your contacts into.
-
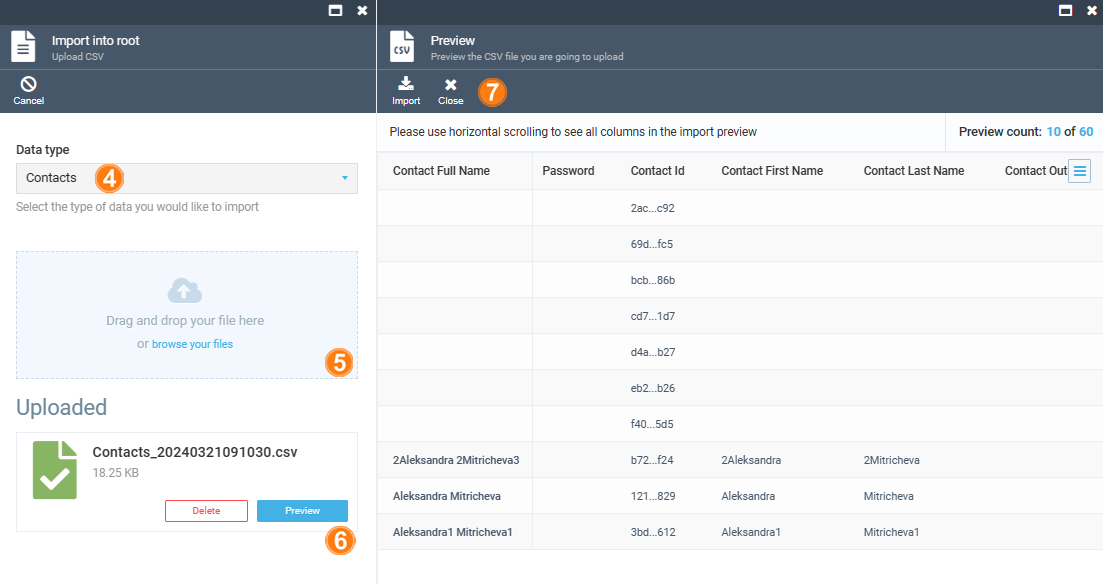
In the next blade, select the data type from the dropdown list (Contacts or Organizations).
-
Browse your file or drag and drop it to the specififed field.
-
After uploading files, click Preview to open the uploaded contacts in the next blade.
- Verify the result. Click Import in the top toolbar to complete the process. Otherwise, click Close.
- Confirm your action.
Your contacts have been uploaded.
Update Contacts
The procedure for updating contacts is similar to the one for importing contacts. The system finds organizations by Id or outer Id and updates them.